

Build Web Fullstack Apps with DIRT: Django, Inertia, React & Tailwind CSS aka D.I.R.T Stack


Lately, I've been digging into (🙃) the world of InertiaJs so, here’s a mini guide on how to get Tailwind CSS working in your Django + InertiaJs + React (Vite) project. Since there are so many “stacks” out there already, I figured, let’s just make one (assuming this hasn’t been done before).
ℹ️ This is a repost of what I originally wrote on dev.to
A few notes to get started
The following pre-requisites would be helpful to get things going smoothly
A code editor or IDE (I’m using PyCharm)
A willingness to try things
Some knowledge of Django 🐍, React ⚛️, TypeScript & Tailwind CSS
Like most things code, this is a work-in-progress
ℹ️ PyCharm community does not have NodeJs support so you will not get code completion when we get to the React part. Also, I’ll be using a separate terminal just to get screenshots. Normally I use PyCharm’s terminal.
Framework & Language versions
Django v4.1 LTS
InertisJS 1.0
React 18 / Vite 4
Tailwind CSS 3
Tested Platforms
✅ MacOS
✅ Ubuntu
✳️ Windows (I'm sure this will work)
Django Project Setup
Before we get started, I’m going to give an overview of what we’re going to be using
pipenvto manage virtual environments (If you like, you can use the more classical approach of usingvirtualenv).Gitbecause it’s just a good idea
Everything else we need will be pretty standard. Since this is a mini-guide, we’re not going to worry about things like what database we’ll be using.
ℹ️ We’re going to be using pipenv. if you have not yet installed it, click here for instructions.
ℹ️ You may choose to use virtualenv if you’d like
- Start by creating a new Django Project. We’ll call it
dirt-tutorial
# create the directory
mkdir dirt-tutorial

# navigate to directory
cd dirt-tutorial
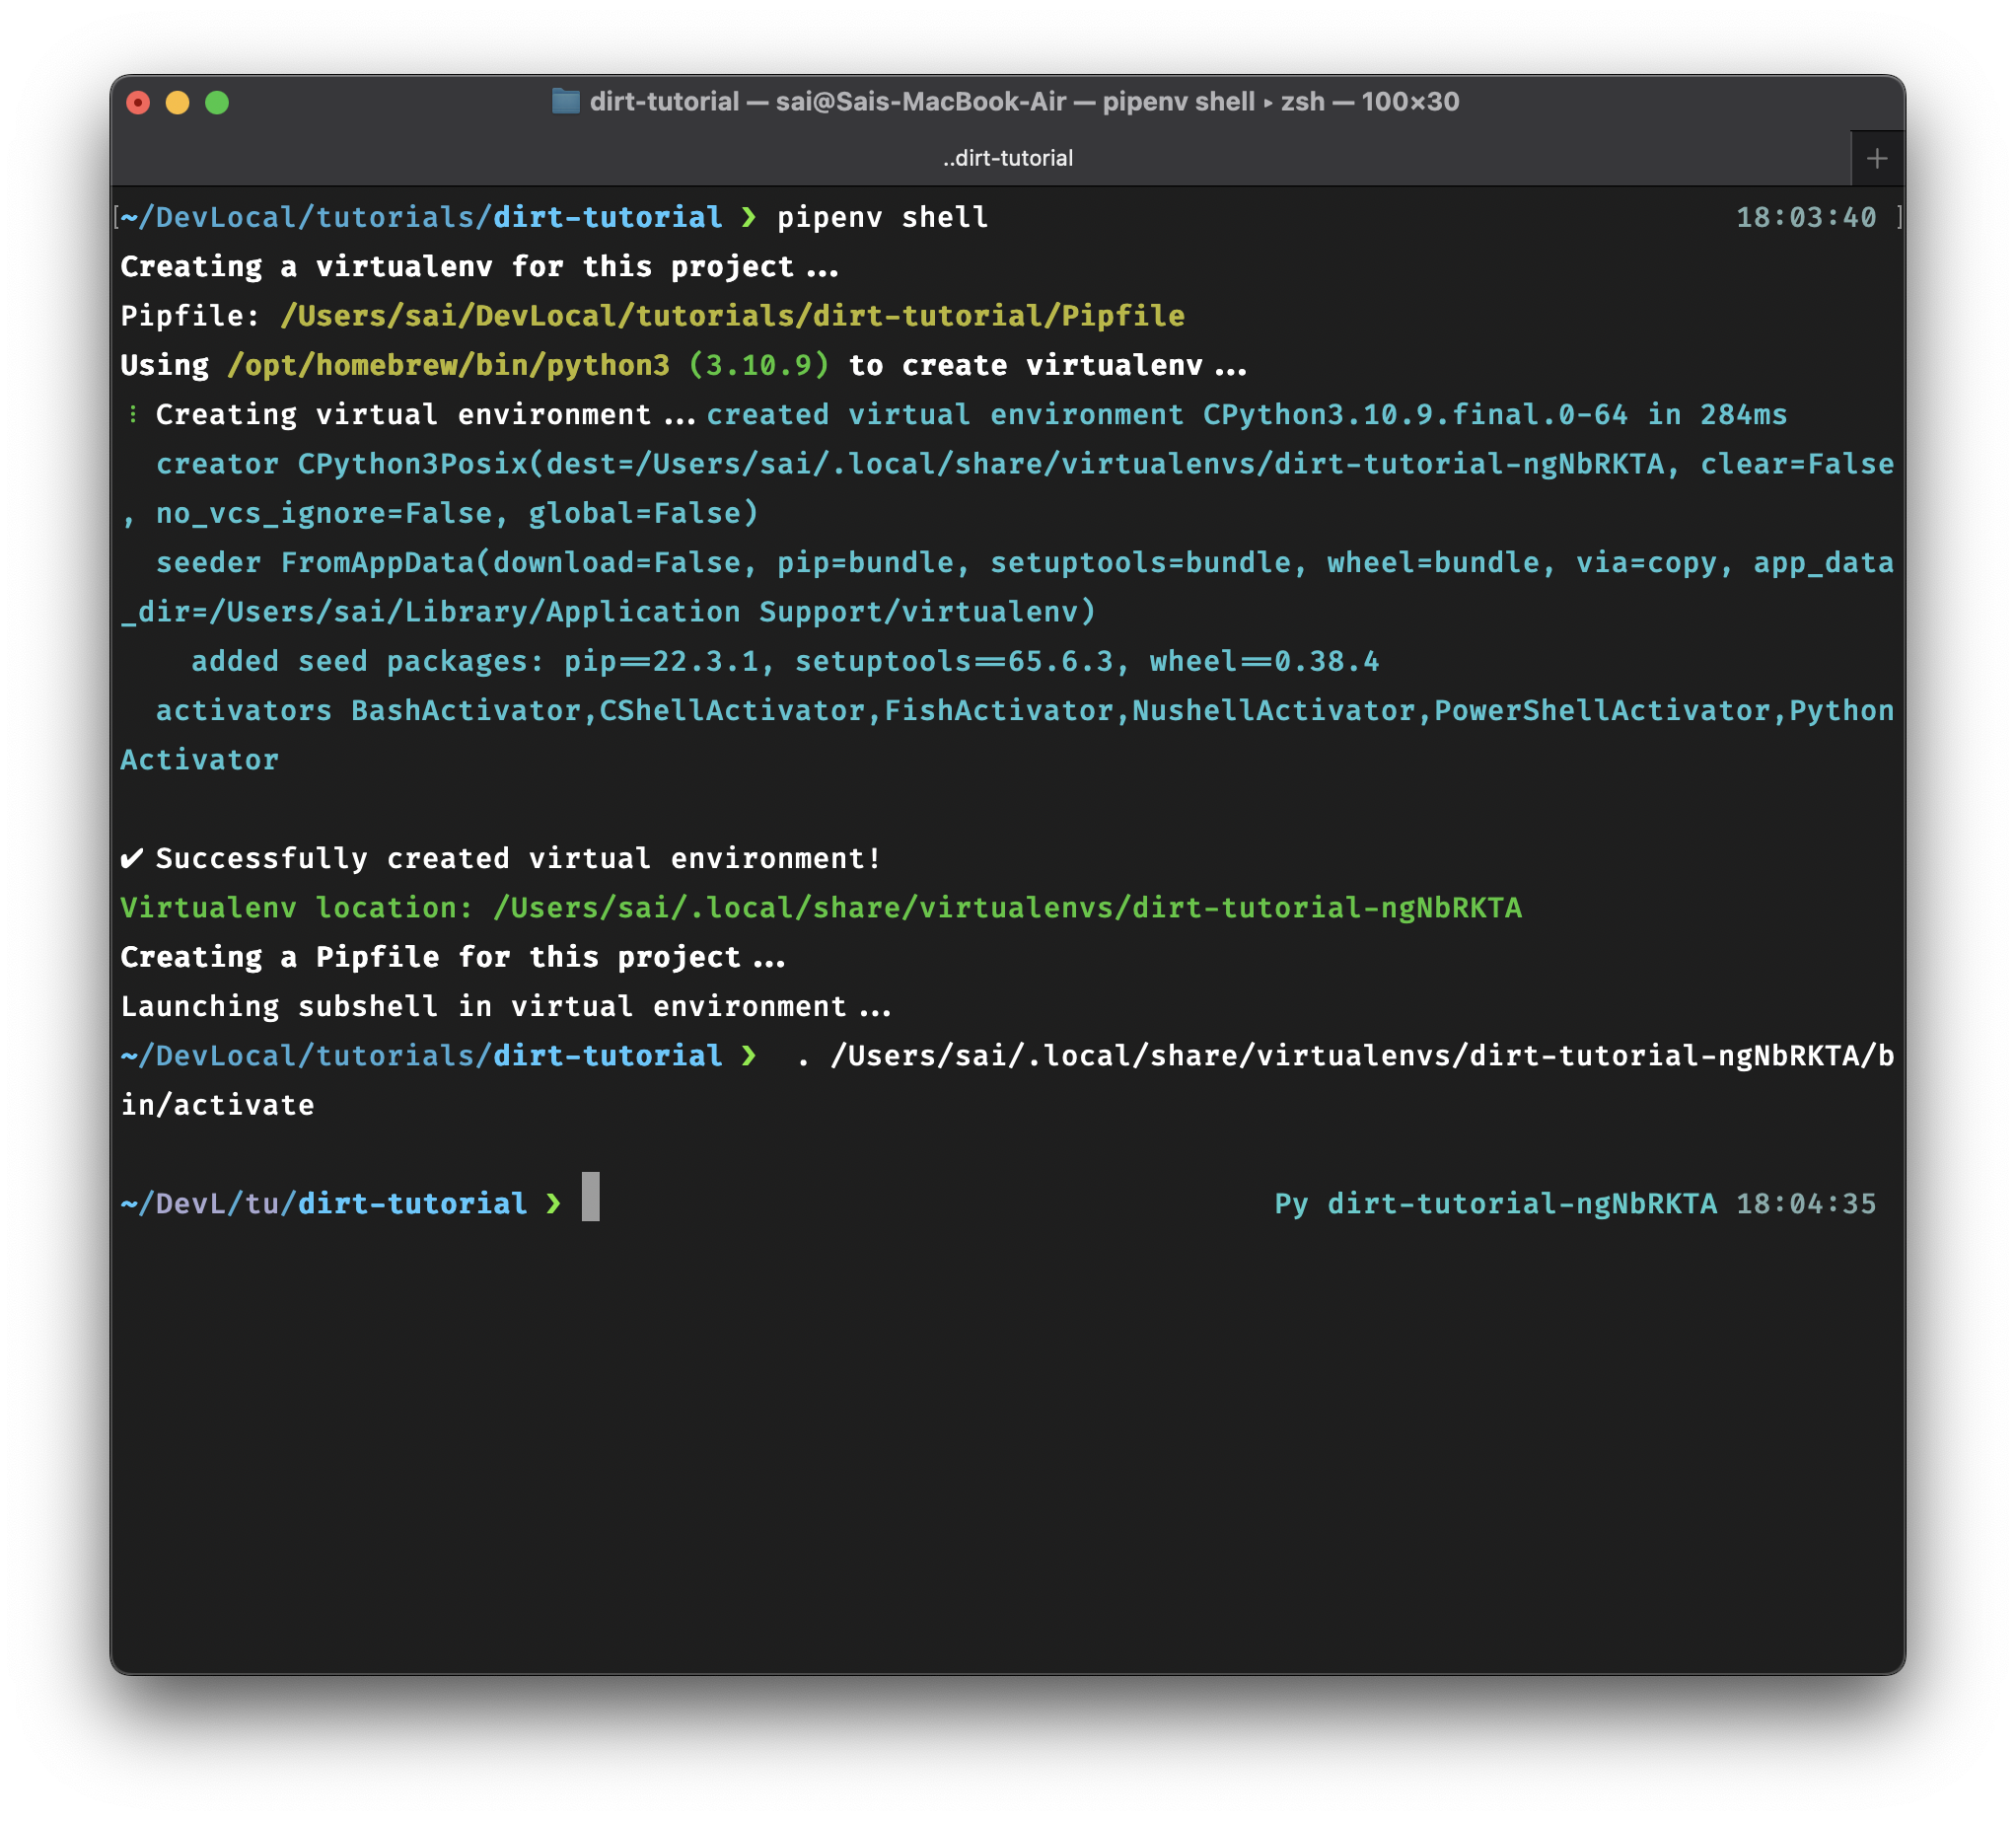
- Activate the virtual environment
pipenv shell
Installing Django
We’re going to need to install a few dependencies on both the Python / Django side as well as the React / Vite side. To make it easier, I’m giving you all the steps you need to get started.
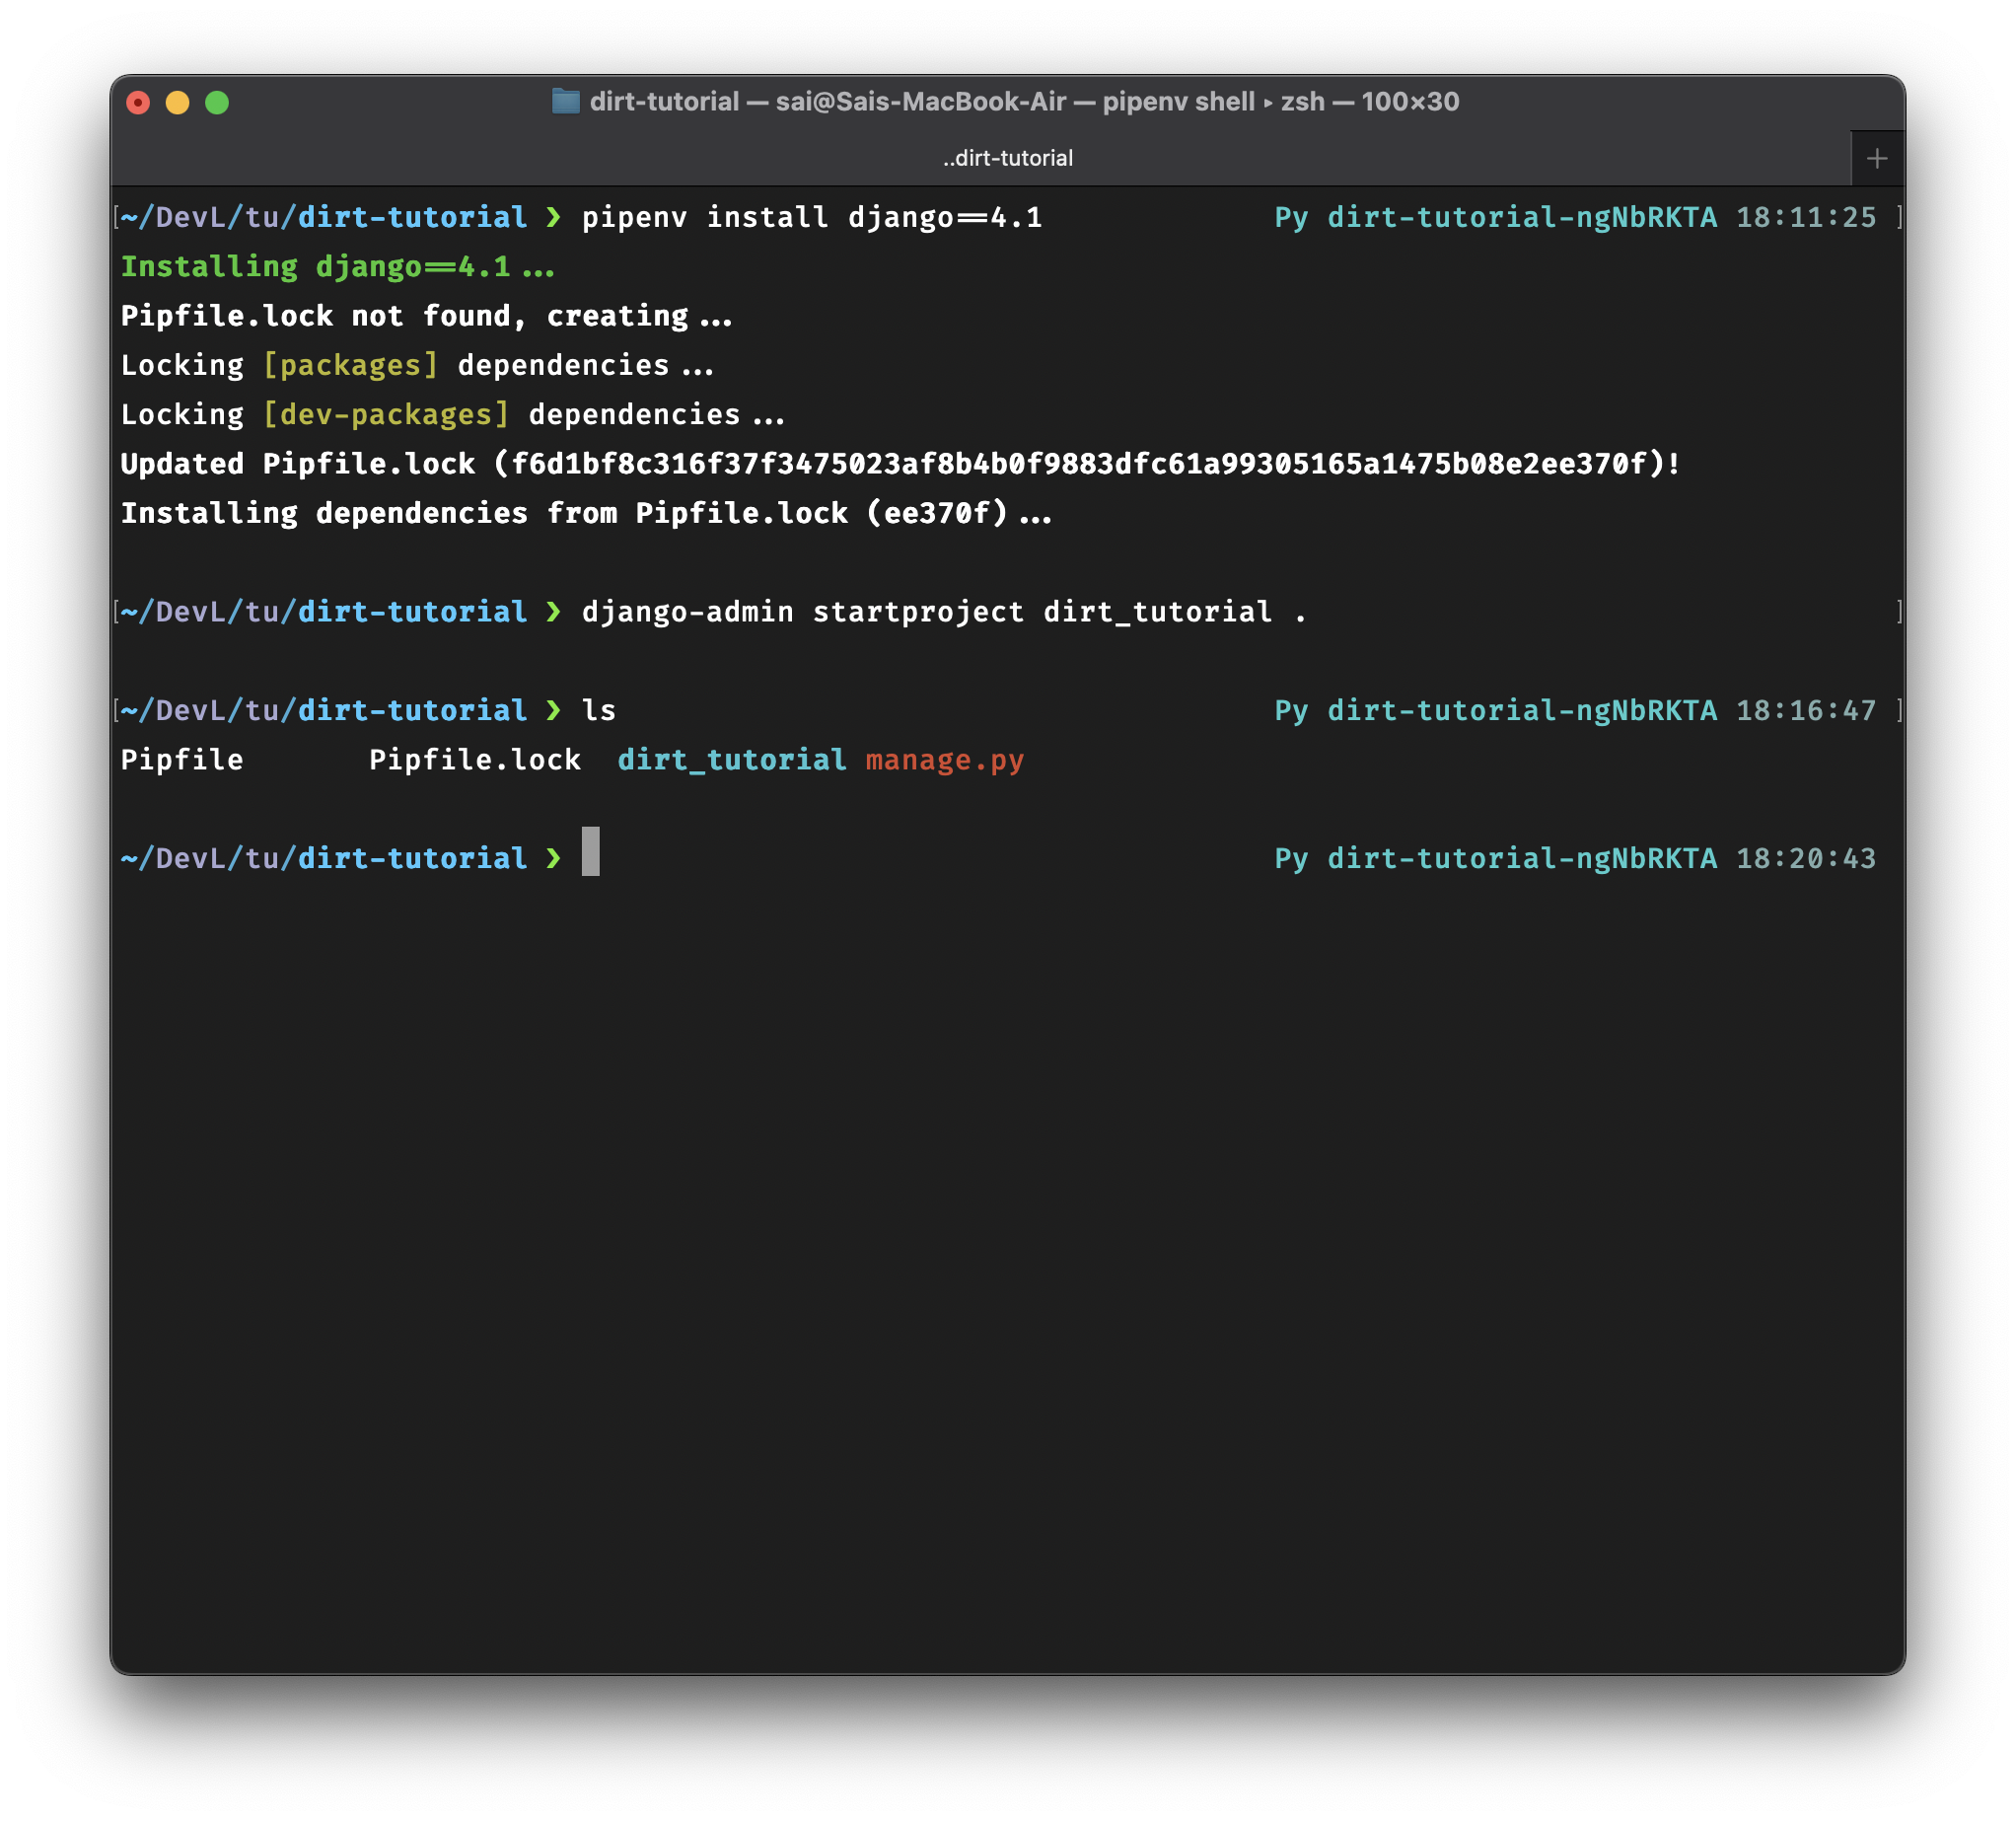
- Install Django via
pipenv
pipenv install django==4.1
ℹ️ Be sure to check to see if any security updates need to be installed for Django and update accordingly
- Create the project using
django-adminin the current directory
django-admin startproject dirt_tutorial .
Now would be a good time to make sure everything is working as it should.
- Run the Django dev server using
./manage.py
./manage.py runserver

✳️ You can apply the unapplied migrations at this point if you would like.
We should also set up GIT at this point. So let’s go ahead and do that. I’m including a minimal .gitignore file that should suffice for our purposes.
- Initialize a new repo in the current directory (📂)
git init
- Create a
.gitignorefile and copy in the contents below. This is a minimal ignore file btw.
# Byte-compiled / optimized / DLL files
__pycache__/
*.py[cod]
*$py.class

# PyInstaller
*.manifest
*.spec

# Installer logs
pip-log.txt
pip-delete-this-directory.txt

# Django stuff:
*.log
db.sqlite3
db.sqlite3-journal

# Minimal Virtualenv
.venv

# Jetbrains
.idea

# Minimal NodeJS
dist
node_modules

Go ahead and commit your files. If you have a remote for your repo, you can push.
Inertia Setup
Now that we have a working base project, let’s start adding the pieces of the puzzle that will allow us to make use of Inertia.
- Create a new branch from
main, we can call it something likesetup-inertia
git checkout -b setup-inertia
- Install dependencies for Inertia via
pipenv install
pipenv install inertia-django django-vite

Now that we have our dependencies installed, let’s make the necessary updates to the files we need.
- Update
settings.pyto includedjango_viteandinertiainINSTALLED_APPS, andinertia.middleware.InertiaMiddlewareinMIDDLEWARE
INSTALLED_APPS = [
    # default apps removed to save space

    # D.I.R.T Stack apps
    "django_vite", # <- add this app
    "inertia", # <- add this app too
    # our apps
]

MIDDLEWARE = [
    # default middleware removed to save space

    # D.I.R.T Stack middleware
    "inertia.middleware.InertiaMiddleware", # <- add this
]

- Create a template file
./templates/base.html. We’ll modify this a few times so you can keep it open in your editor or IDE
{% load django_vite %}
<!DOCTYPE html>
<html lang="en">
    <head>
        <meta charset="UTF-8">
        <meta name="viewport" content="width=device-width, initial-scale=1"/>
                 <!-- vite hmr -->
        {% vite_hmr_client %}
        {% vite_asset 'src/main.js' %}
        <title>D.I.R.T Stack - Django Inertia React Tailwind CSS</title>
    </head>
    <body>
        <!-- inertia -->
        {% block inertia %}{% endblock %}
    </body>
</html>
- Update the
settings.pyto include the following change toDIRSas shown below
TEMPLATES = [
    {
        'BACKEND': 'django.template.backends.django.DjangoTemplates',
        'DIRS': [BASE_DIR / 'templates'],  # <- update this
        # other templates removed to save space
    },
]
- While we’re still in the
settings.pyfile, let’s add the following settings to the end
# D.I.R.T Stack Settings

INERTIA_LAYOUT = 'base.html'

# We need this for django form posting
CSRF_HEADER_NAME = 'HTTP_X_XSRF_TOKEN'
CSRF_COOKIE_NAME = 'XSRF-TOKEN'

# Where ViteJS assets are built.
DJANGO_VITE_ASSETS_PATH = BASE_DIR / 'react-app' / 'dist'

# If we should use HMR or not.
DJANGO_VITE_DEV_MODE = DEBUG

# we need this to get around cors issues
DJANGO_VITE_DEV_SERVER_HOST = '127.0.0.1'

# this is the default, but I'm leaving this here, so you know what to change if you want to run on a different port
DJANGO_VITE_PORT = 3000

# Name of our static files' folder (after called python manage.py collectstatic)
STATIC_ROOT = BASE_DIR / 'static'

# Include DJANGO_VITE_ASSETS_PATH into STATICFILES_DIRS to be copied inside
# when run command python manage.py collectstatic
STATICFILES_DIRS = [DJANGO_VITE_ASSETS_PATH]
Let’s get our initial django-vite setup going
ℹ️ We will be using pnpm for this project. That being said, you may use npm or yarn if you’d like. For installation instructions for pnpm click here.
- At the root of our project, let’s create our
package.json
pnpm init
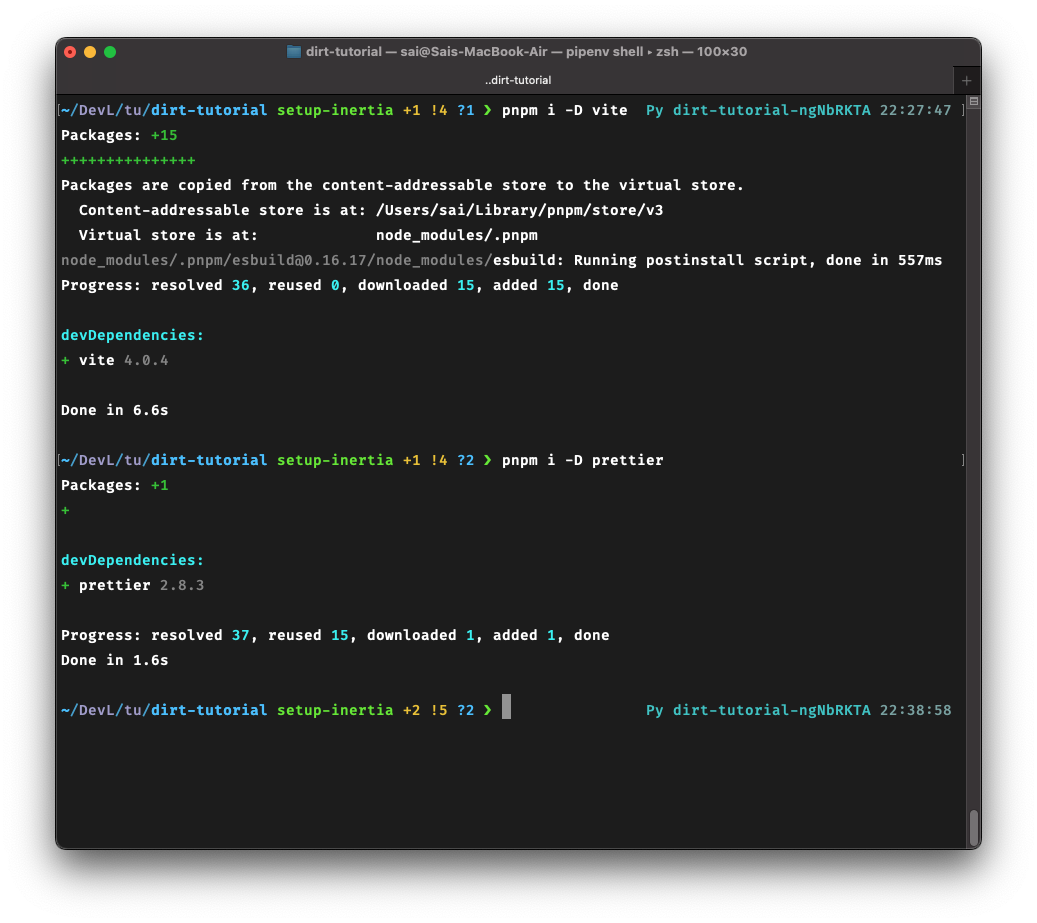
- Install Vite 🚀 and Prettier
pnpm i -D vite prettier
- Create a
.prettierrc.jsonat the root of our project with the following content (minimal)
{
  "semi": true,
  "singleQuote": true,
  "tabWidth": 2,
  "trailingComma": "es5"
}
- Create
vite.config.jsat the root of our project with the following content
import { resolve }  from 'path';

module.exports = {
 plugins: [],
 root: resolve('./react-app'),
 base: '/static/',
 server: {
   host: 'localhost',
   port: 3000,
   open: false,
   watch: {
     usePolling: true,
     disableGlobbing: false,
   },
 },
 resolve: {
   extensions: ['.js', '.json'],
 },
 build: {
   outDir: resolve('./react-app/dist'),
   assetsDir: '',
   manifest: true,
   emptyOutDir: true,
   target: 'es2015',
   rollupOptions: {
     input: {
       main: resolve('./react-app/src/main.js'),
     },
     output: {
       chunkFileNames: undefined,
     },
   },
 },
};
create the folder
./react-app/distsince this is where our built assets will eventually end upcreate our main file
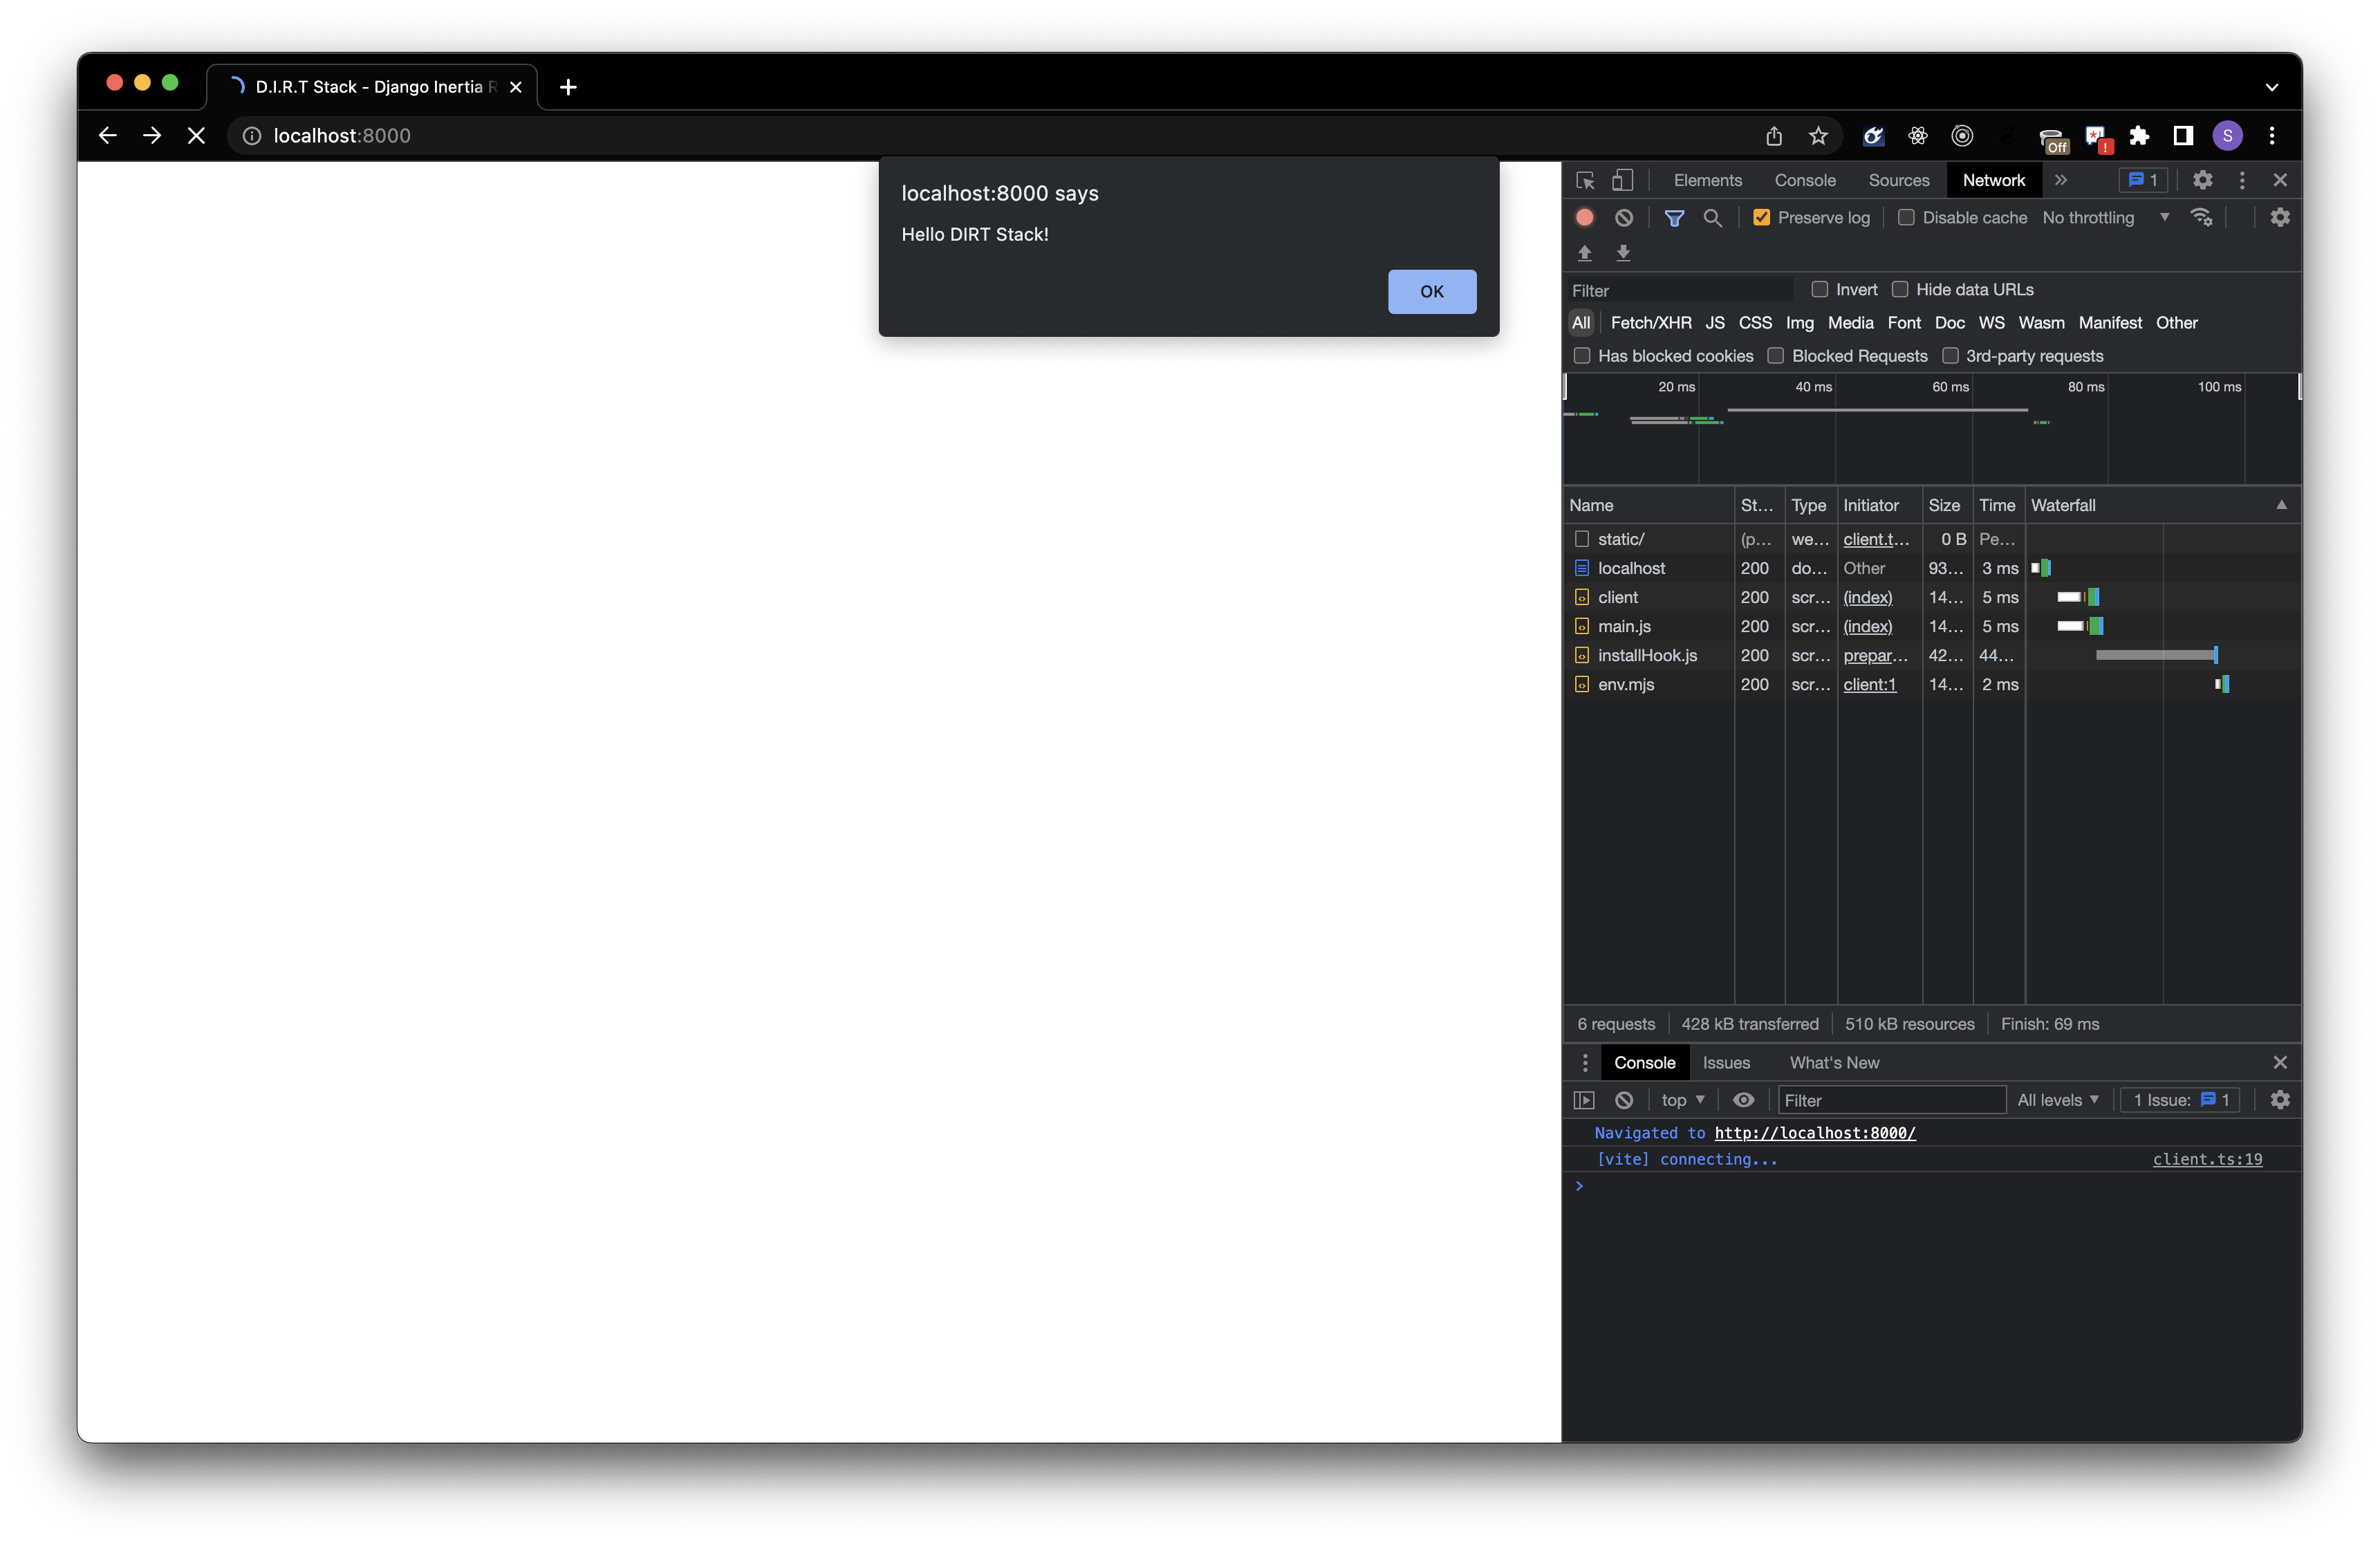
./react-app/src/main.js(we’ll rename this tomain.jsxlater as this will be our Inertia entry point)
alert('Hello DIRT Stack!');
We’re almost ready to get things going. Let’s update our package.json file so that we can run Vite
- Update the
scriptssection ourpackage.jsonas shown below
{
    "scripts": {
    "vite-build": "vite build",
    "vite-dev": "vite",
    "test": "echo \"Error: no test specified\" && exit 1"
  },
}
- Create a views file
./dirt_tutorial/views.pywith the following content
from django.shortcuts import render

def index(request):
    return render(request, template_name="base.html")
- Update our main url pattern file
./dirt_tutorial/urls.pyas follows
from django.contrib import admin
from django.urls import path
from dirt_tutorial import views  # <- this was added

urlpatterns = [
    path('', views.index, name='home'),  # <- this was added
    path('admin/', admin.site.urls),
]
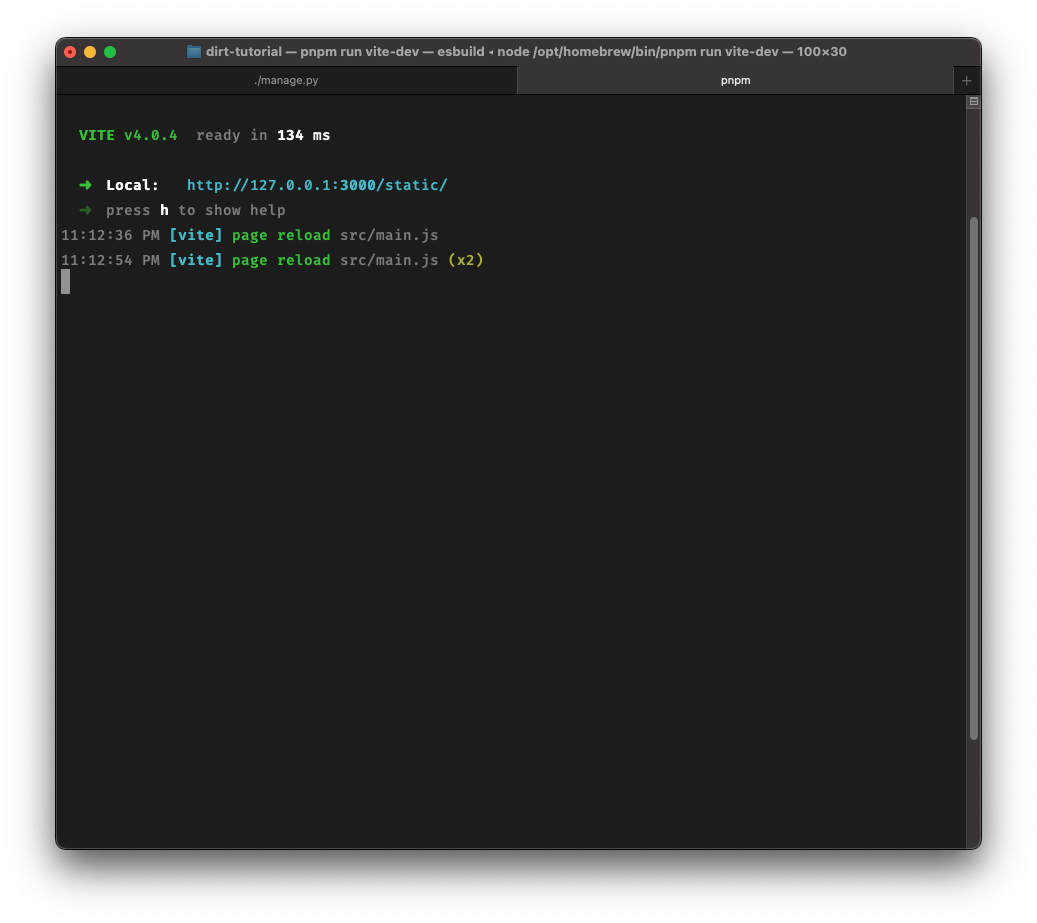
Now we can test things out. Go ahead and start the Django dev server in a separate terminal and then start Vite.
./manage.py runserver

# in another terminal
pnpm run vite-dev
If everything worked, you should see the following results
✳️ This would be a good time to commit the changes and prepare to move on to the next section. You can also merge these changes into the main branch.
React (Vite Setup)
We’re now at the point where we can add in React and the frontend part for InertiaJS. Let’s go ahead and get set up.
- Create a new branch
git checkout -b setup-react
ℹ️ If you have Vite running, now would be a good time to stop it.
- Install the dependencies for React
pnpm i -D react react-dom @vitejs/plugin-react
- Install the dependencies for TypeScript
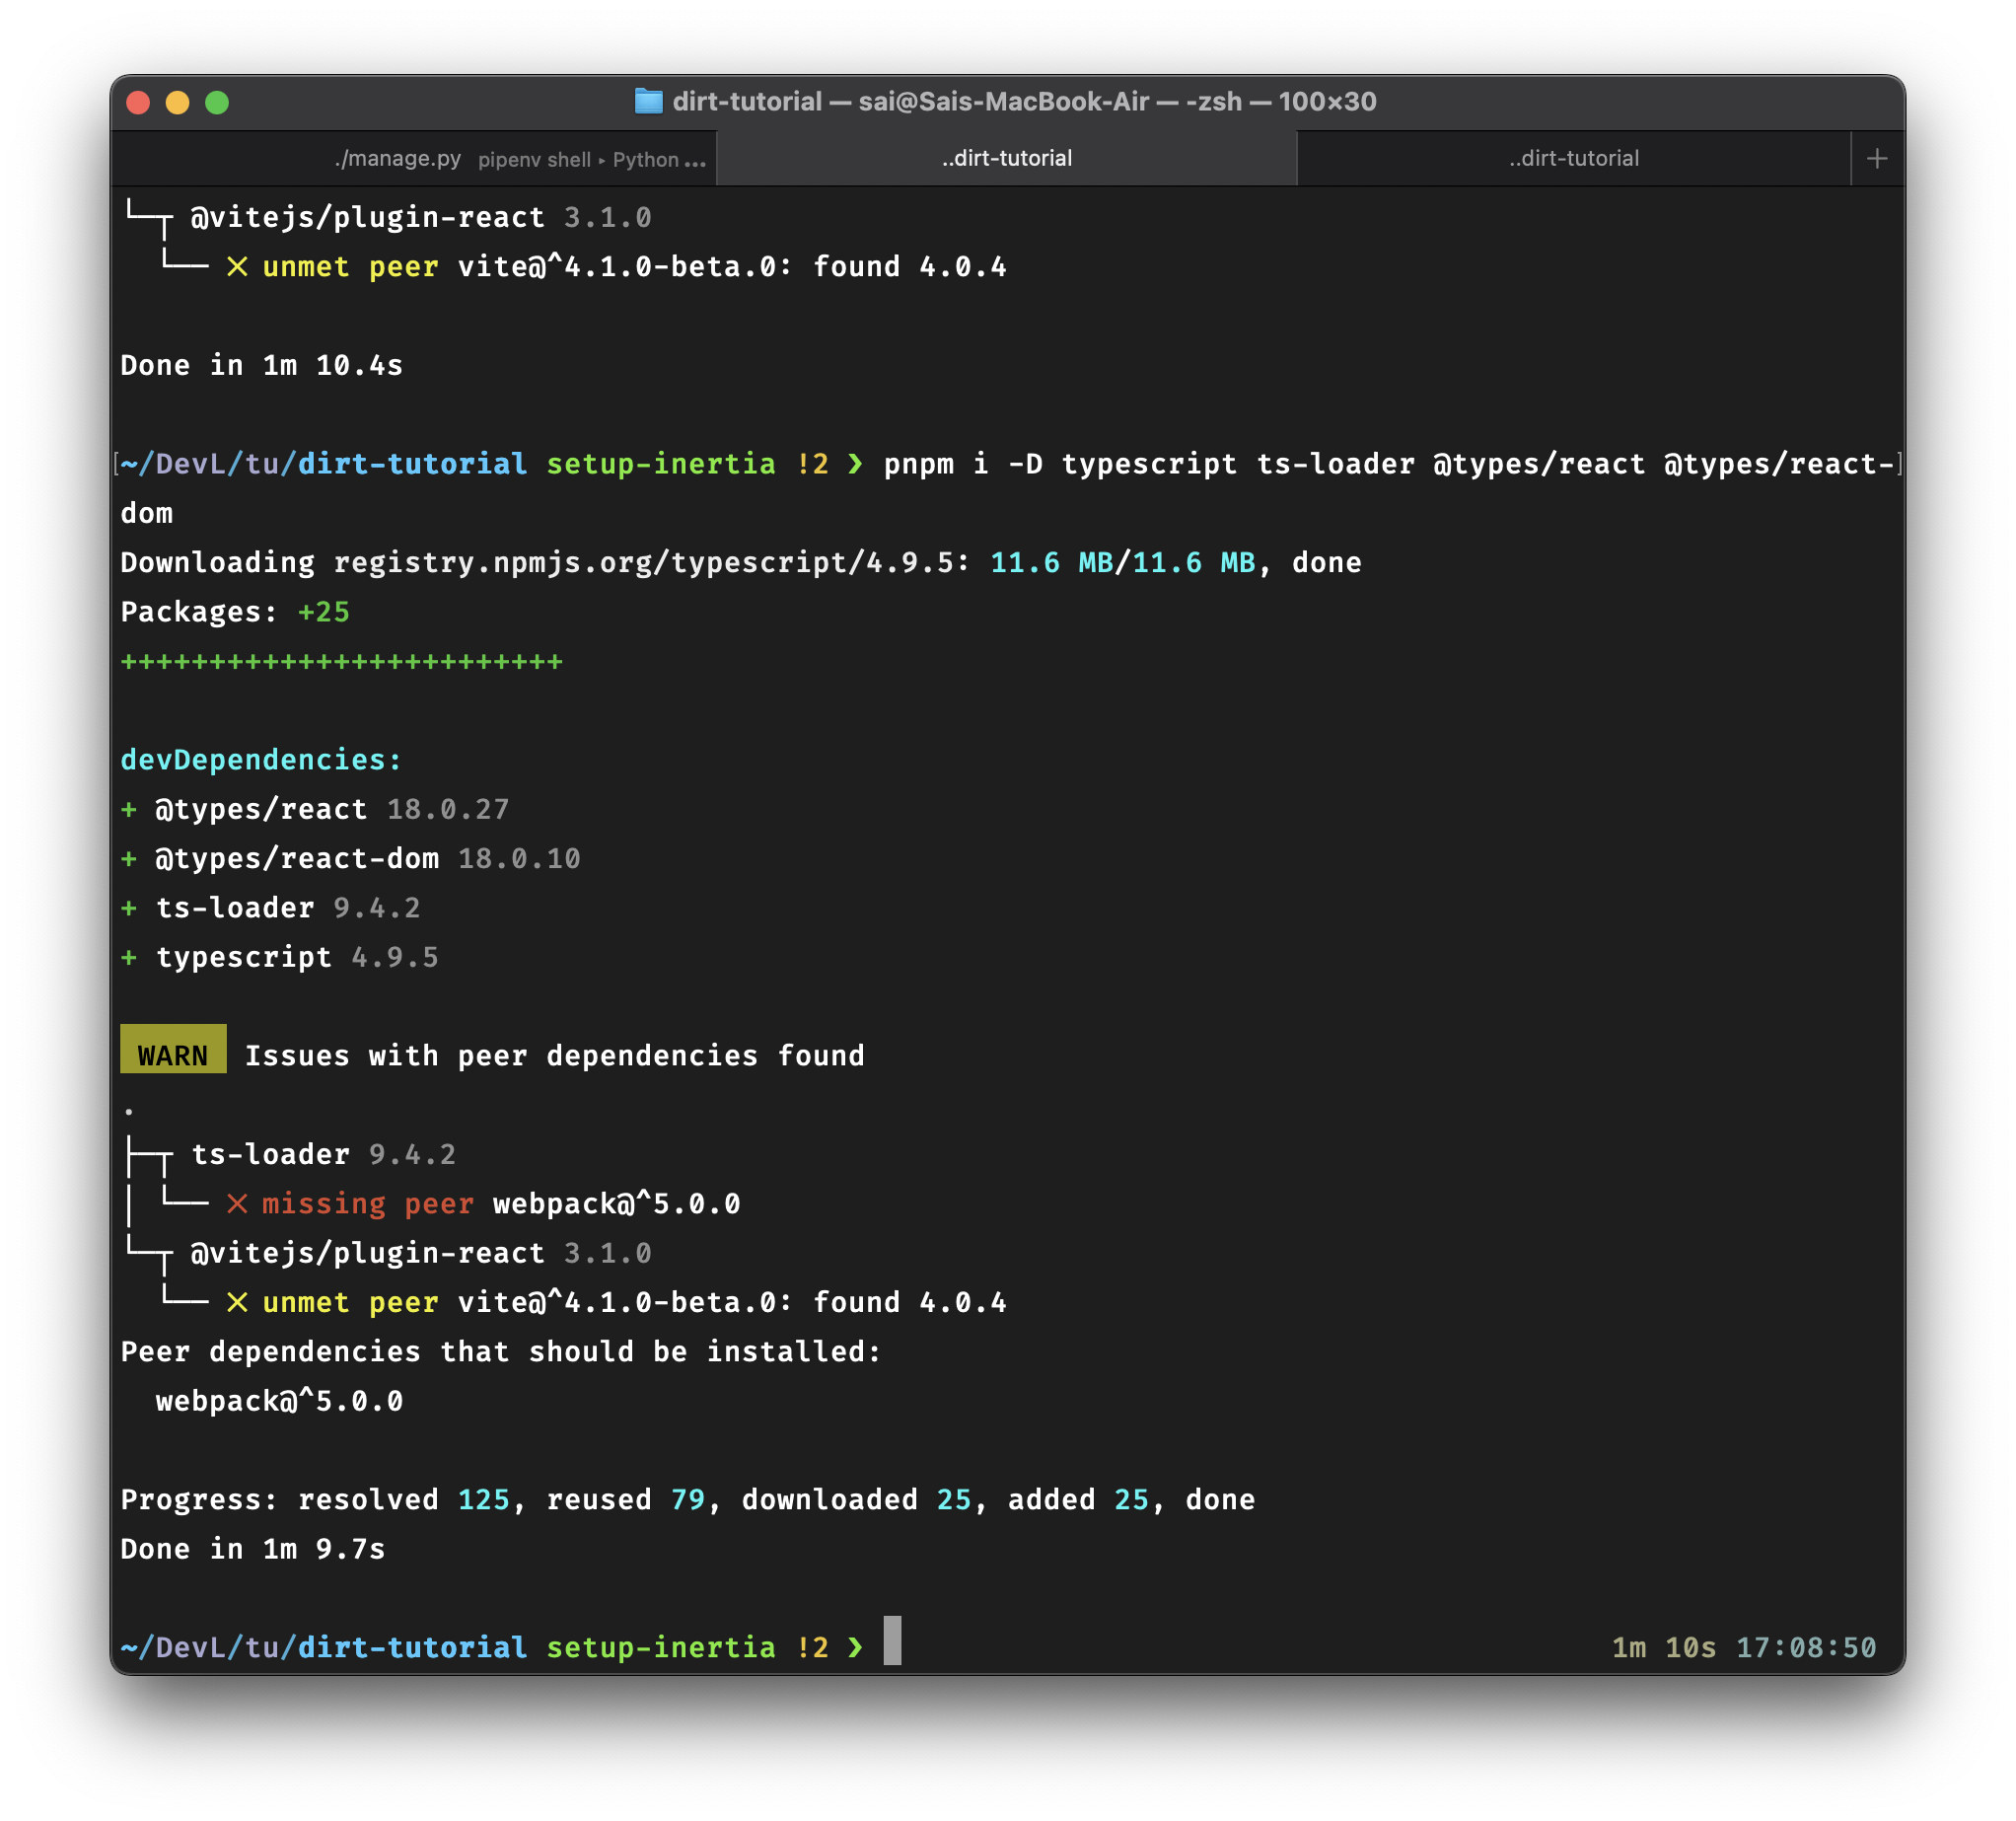
pnpm i -D typescript ts-loader @types/react @types/react-dom
- Install InertiaJS
pnpm i -D @inertiajs/react
- Create a
tsconfig.jsonfile in the root of our project and copy the contents below
{
 "compilerOptions": {
   "target": "ESNext",
   "useDefineForClassFields": true,
   "lib": ["DOM", "DOM.Iterable", "ESNext"],
   "allowJs": false,
   "skipLibCheck": true,
   "esModuleInterop": false,
   "allowSyntheticDefaultImports": true,
   "strict": true,
   "forceConsistentCasingInFileNames": true,
   "module": "ESNext",
   "moduleResolution": "Node",
   "resolveJsonModule": true,
   "isolatedModules": true,
   "noEmit": true,
   "jsx": "react-jsx",
   "types": ["vite/client"],
 },
 "include": ["react-app/src"],
}
- Update our
vite.config.jsfile to work with React
import { resolve } from 'path';
import react from '@vitejs/plugin-react';

module.exports = {
    // this was changed
  plugins: [
    react({
      include: '**/*.disabled',
    }),
  ],
  root: resolve('./react-app'),
  base: '/static/',
  server: {
    host: 'localhost',
    port: 3000,
    open: false,
    watch: {
      usePolling: true,
      disableGlobbing: false,
    },
  },
  resolve: {
    extensions: ['.js', '.json'],
  },
  build: {
    outDir: resolve('./react-app/dist'),
    assetsDir: '',
    manifest: true,
    emptyOutDir: true,
    target: 'es2015',
    rollupOptions: {
      input: {
        main: resolve('./react-app/src/main.jsx'), // <- renamed from main.js
      },
      output: {
        chunkFileNames: undefined,
      },
    },
  },
};
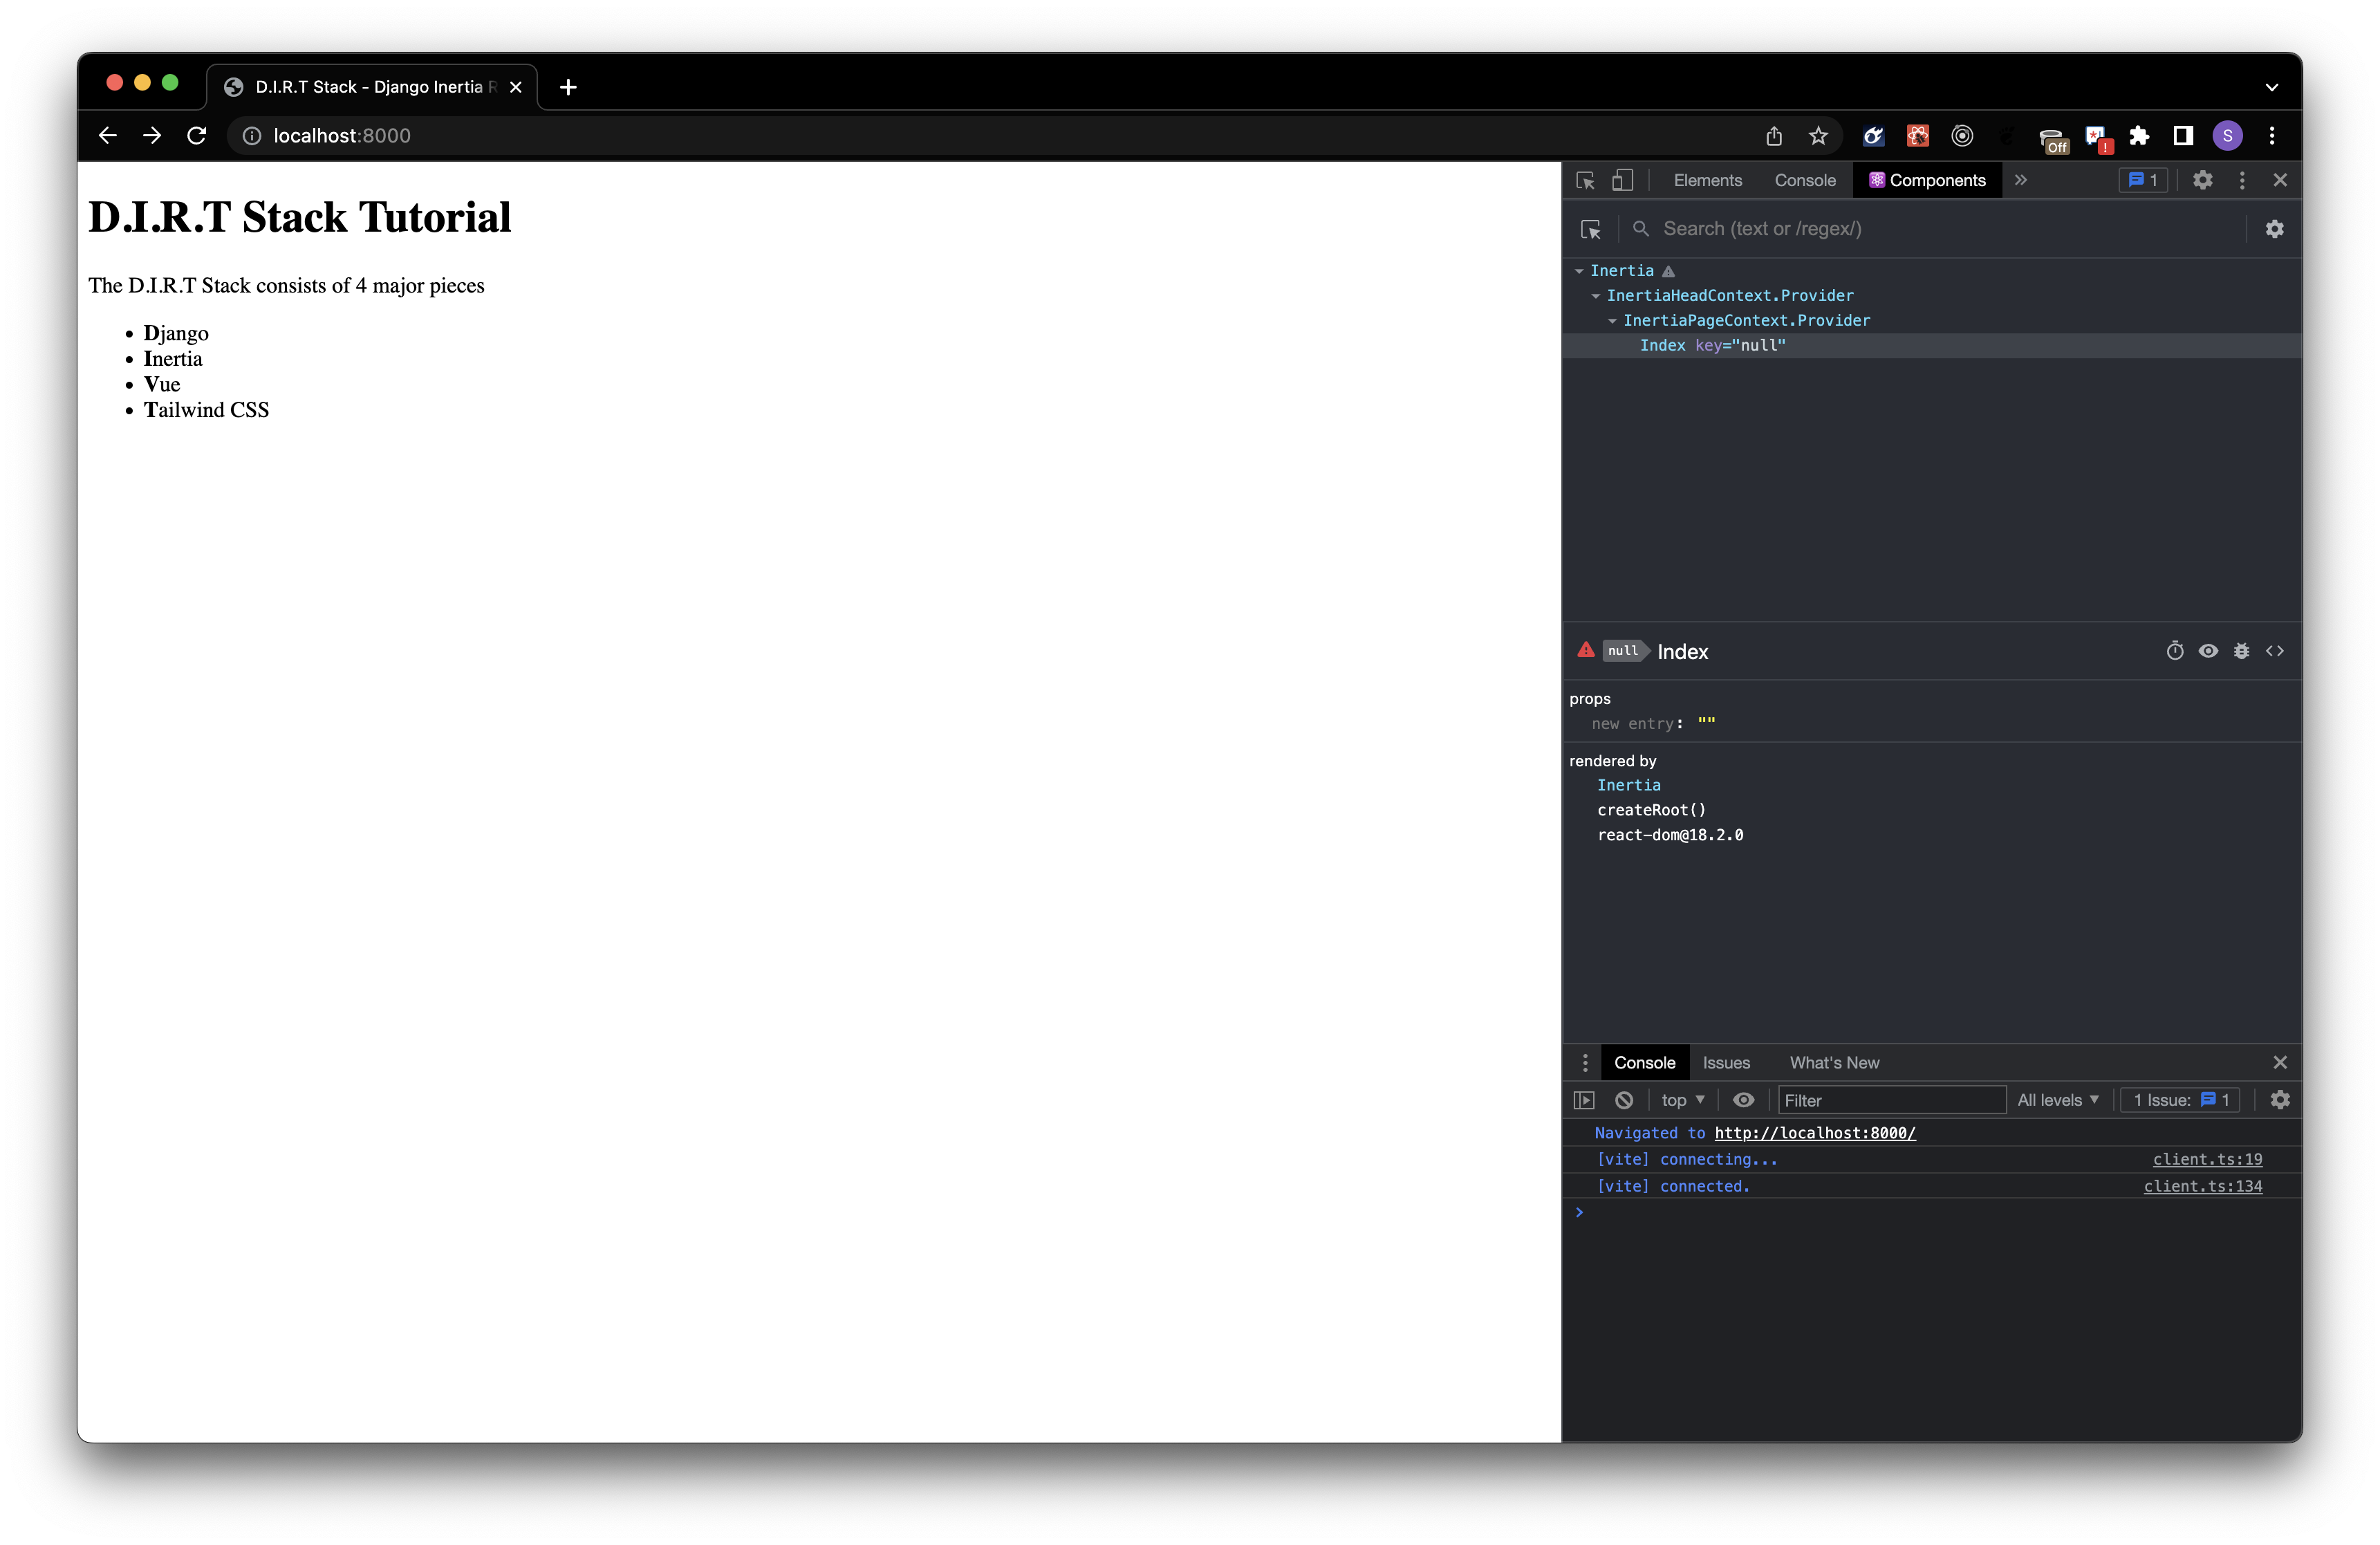
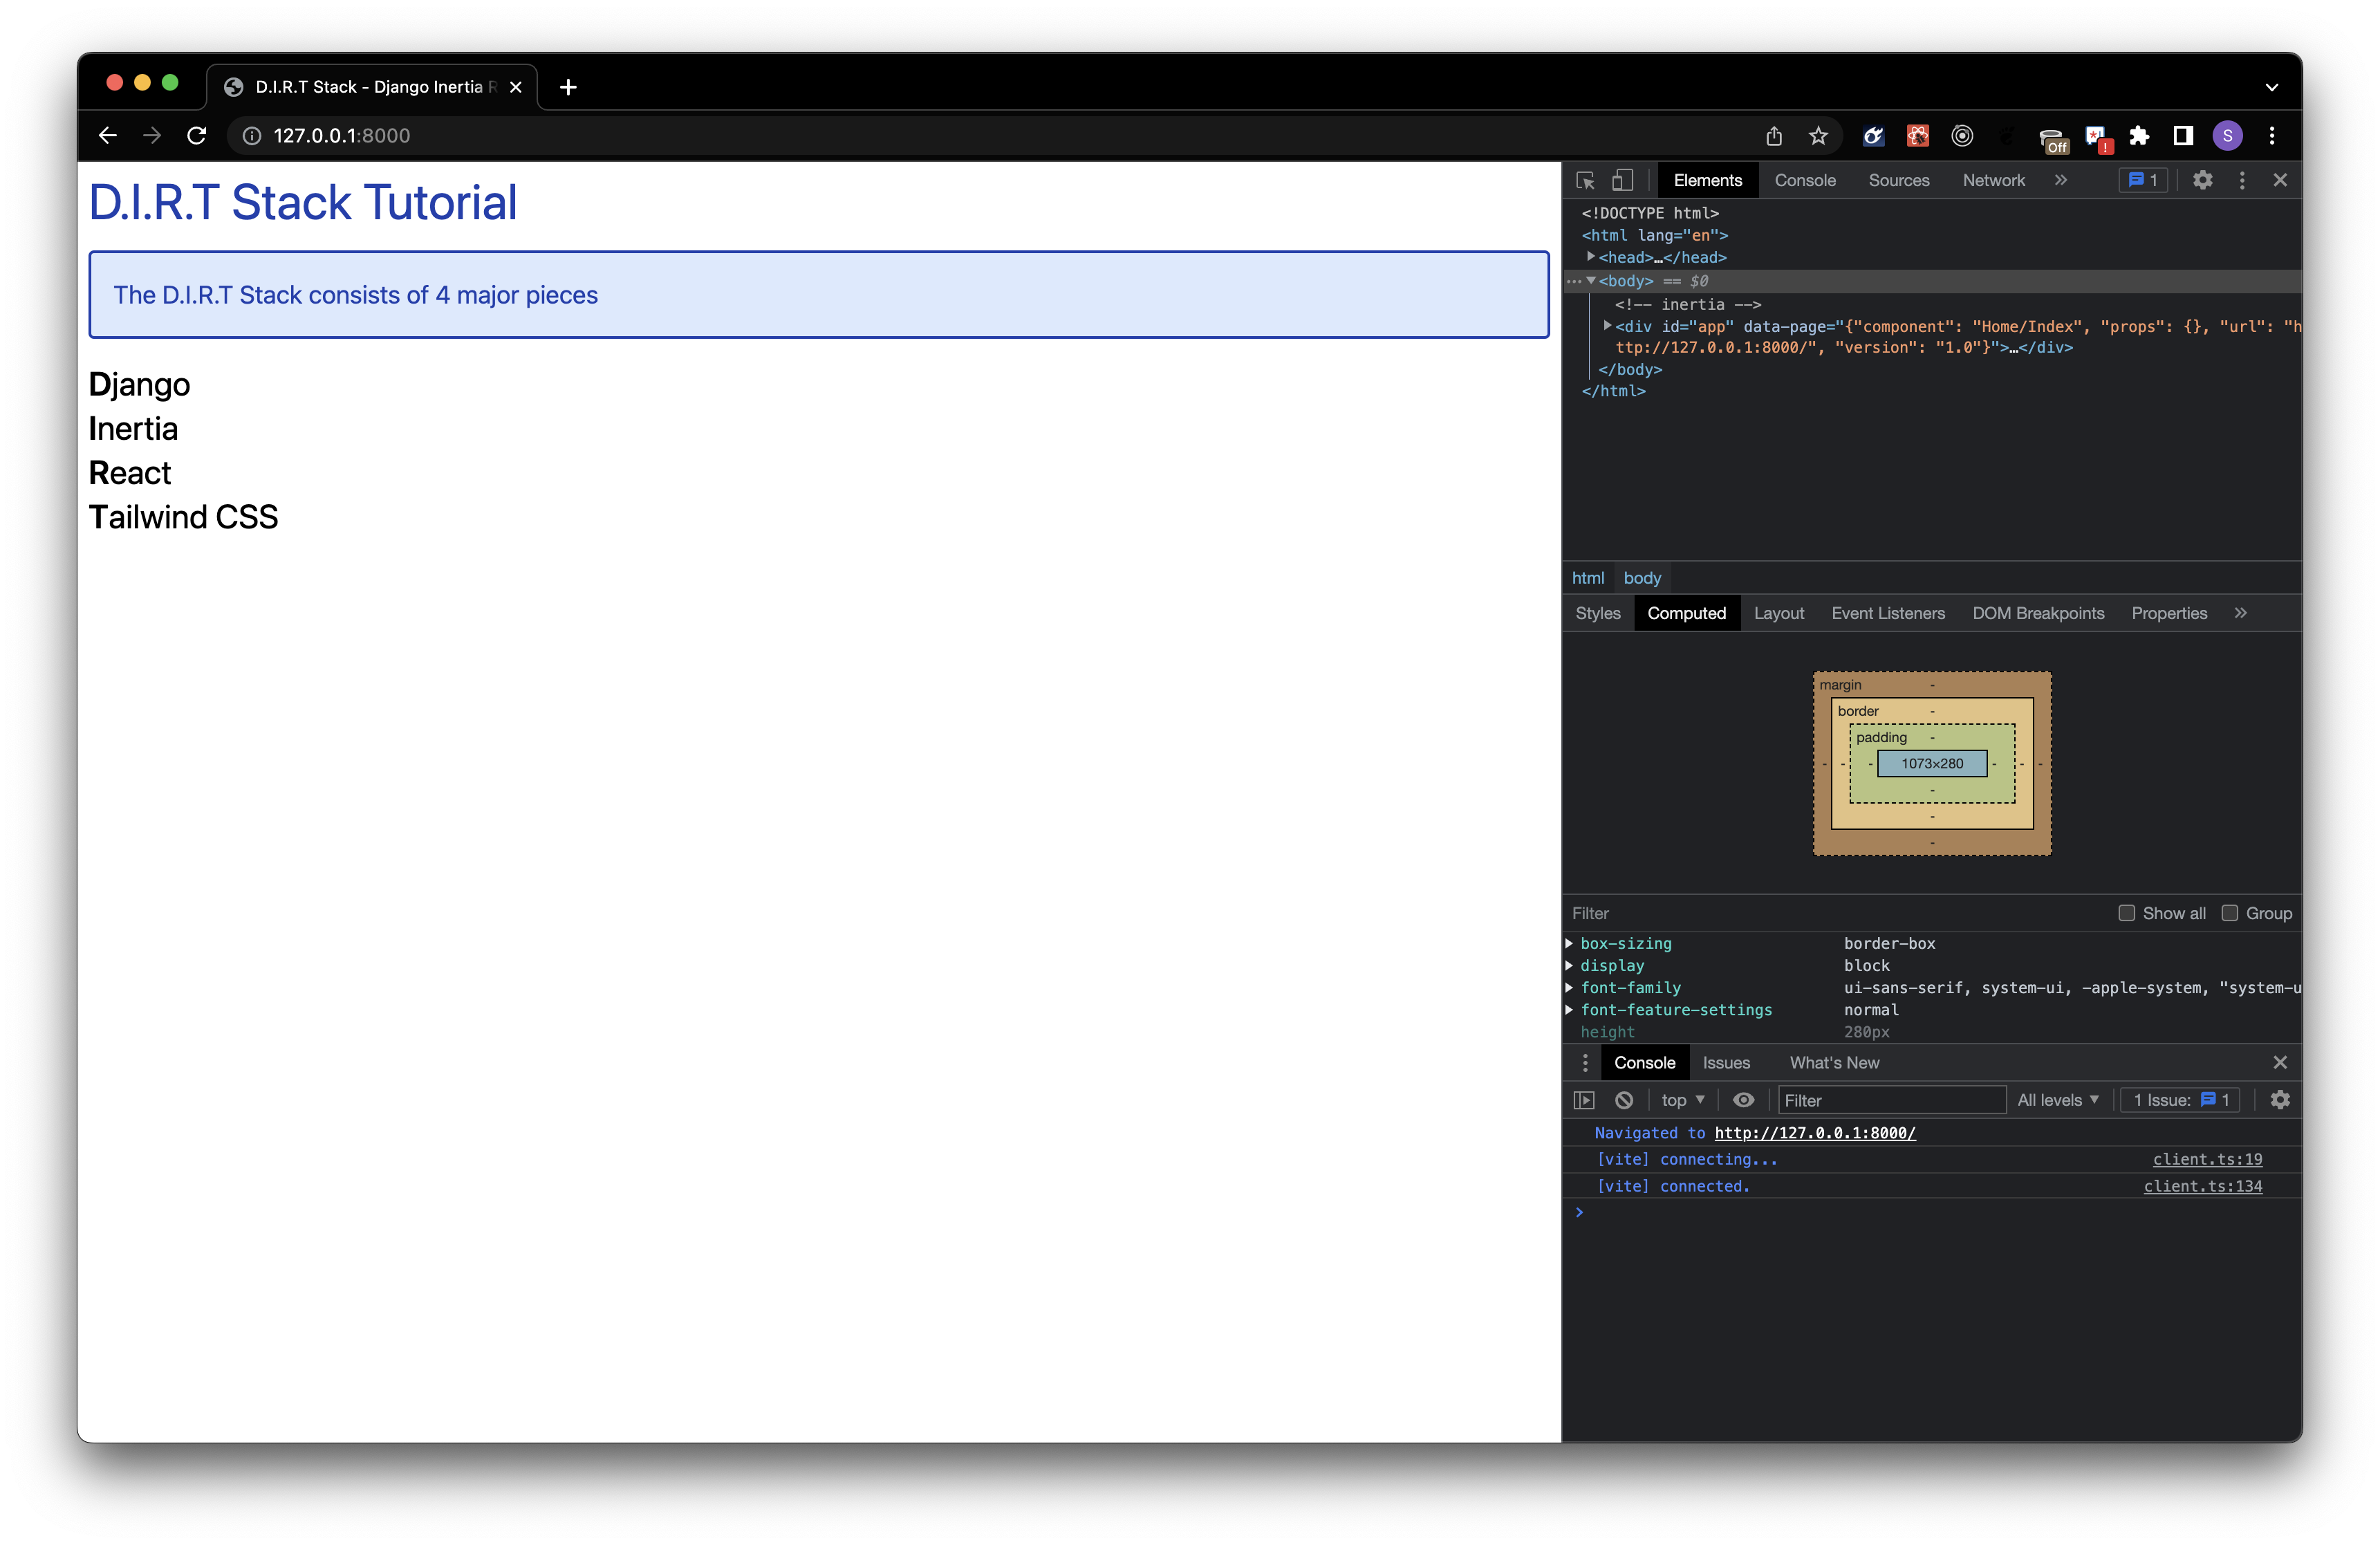
Before we make our changes to main.js, we’ll need to make our index page which will be imported into our main file.
- Create our Index component
./react-app/src/pages/Home/Index.tsxwith the content below (or anything you want to use)
import * as React from 'react';

const Index = (): React.ReactNode => {
  return (
    <div>
      <h1>D.I.R.T Stack Tutorial</h1>
      <p>The D.I.R.T Stack consists of 4 major pieces</p>
      <ul>
        <li><strong>D</strong>jango</li>
        <li><strong>I</strong>nertia</li>
        <li><strong>R</strong>eact</li>
        <li><strong>T</strong>ailwind CSS</li>
      </ul>
    </div>
  )
}

export default Index;
- Rename
main.jstomain.jsxand update the contents as follows
import {createRoot} from 'react-dom/client';
import {createInertiaApp} from '@inertiajs/react';

document.addEventListener('DOMContentLoaded', () => {
  createInertiaApp({
    resolve: (name) => {
      const pages = import.meta.glob('./pages/**/*.tsx', { eager: true });
      return pages[`./pages/${name}.tsx`];
    },
    setup({ el, App, props }) {
      createRoot(el).render(<App {...props} />);
    }
  }).then(() => {});
});
This should cover the React side of things, for now at least. Let’s look at setting up the Django side of things so we can have our view rendered.
- Update
./dirt_tutorial/views.pyas follows
# from django.shortcuts import render  # <- remove this
from inertia import inertia  # <- add this

@inertia('Home/Index')  # <- add this
def index(request):
        # return render(request, template_name="base.html")  # <- remove this
        return {}  # <- add this
- Edit
./templates/base.htmlto point to our newly renamedmain.jsxfile
{% load django_vite %}
<!DOCTYPE html>
<html lang="en">
    <head>
        <meta charset="UTF-8">
        <meta name="viewport" content="width=device-width, initial-scale=1"/>
        <!-- vite hmr -->
        {% vite_hmr_client %}
        {% vite_asset 'src/main.jsx' %} <!-- rename main.js to main.jsx -->
        <title>D.I.R.T Stack - Django Inertia React Tailwind CSS</title>
    </head>
    <body>
        <!-- inertia -->
        {% block inertia %}{% endblock %}
    </body>
</html>
At this point, we can go ahead and make sure things are working.
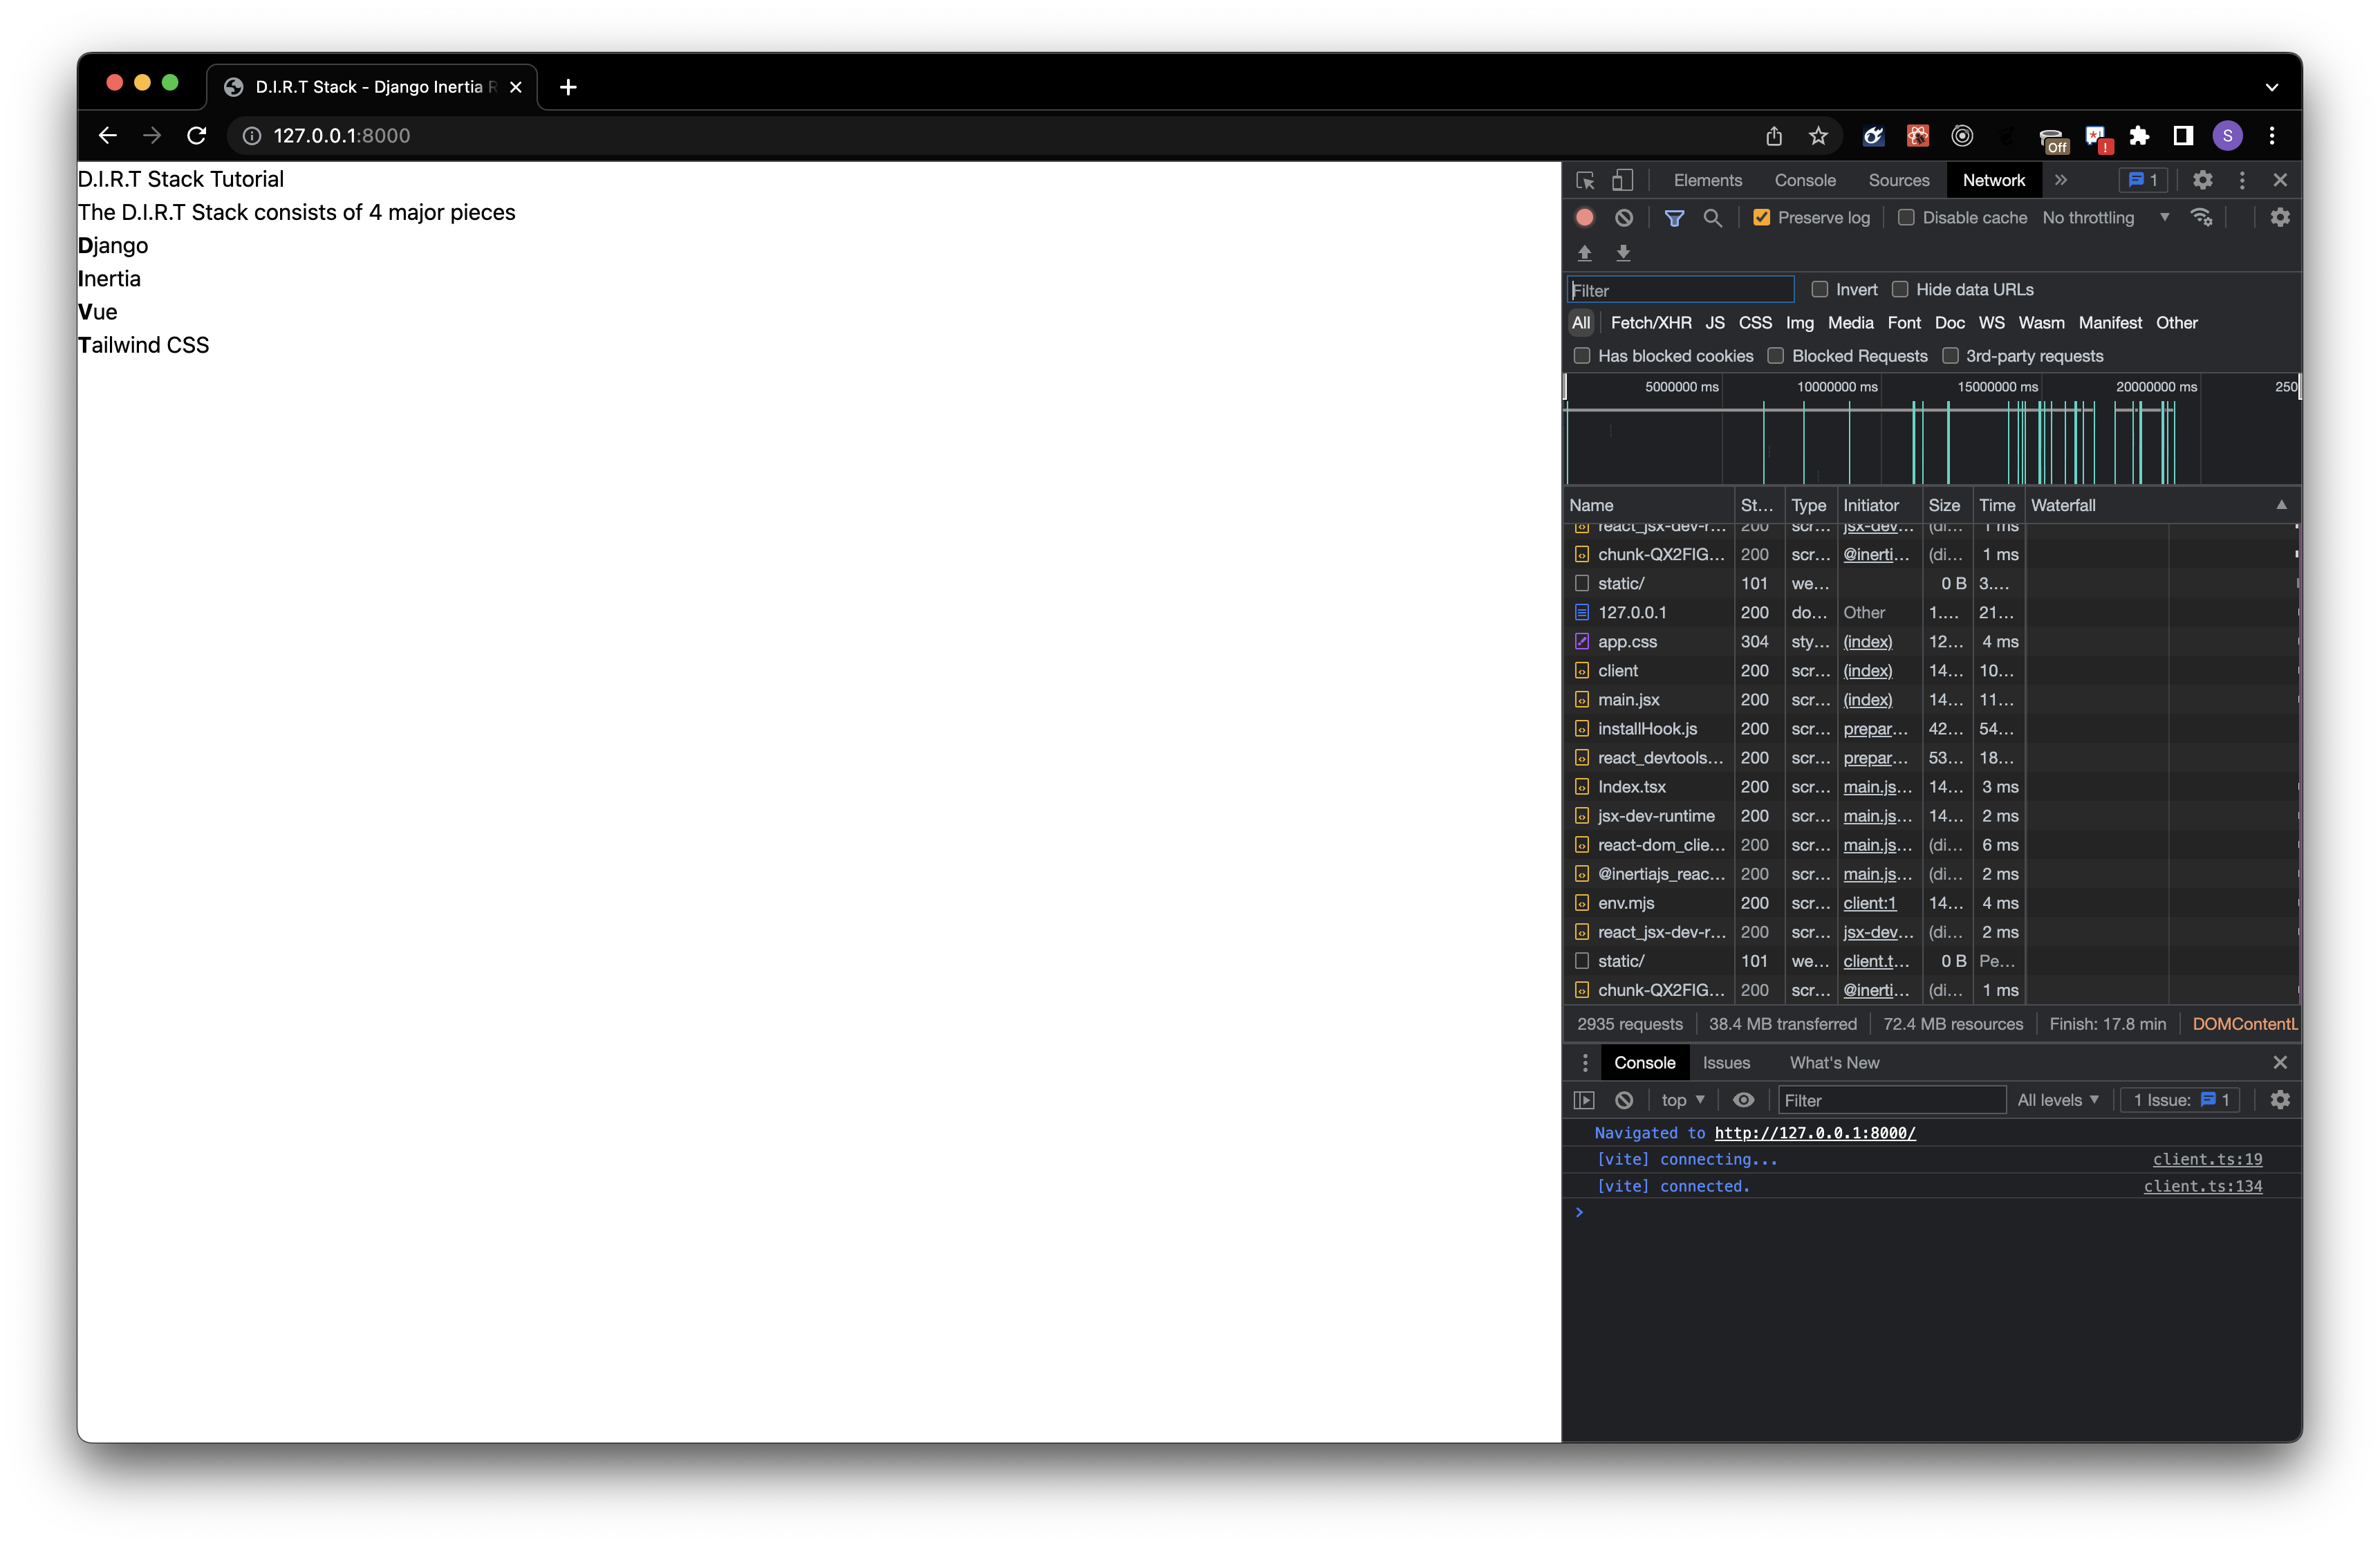
- Start both the Django dev server and Vite and navigate to http://127.0.0.1:8000
ℹ️ You should see something like the window below without any console errors. If you do, have a 🍪 or a 🍺.
- Commit your changes and merge them into
main.
Tailwind CSS setup
We’re at the final part of setting up the D.I.R.T Stack. So, let’s take care of all styling needs for this project.
Stop Vite and then create a new branch
Install
tailwindscssand recommended dependencies along withconcurrently
pnpm i -D tailwindcss postcss autoprefixer concurrently
- Initialize tailwind css
pnpx tailwindcss init -p
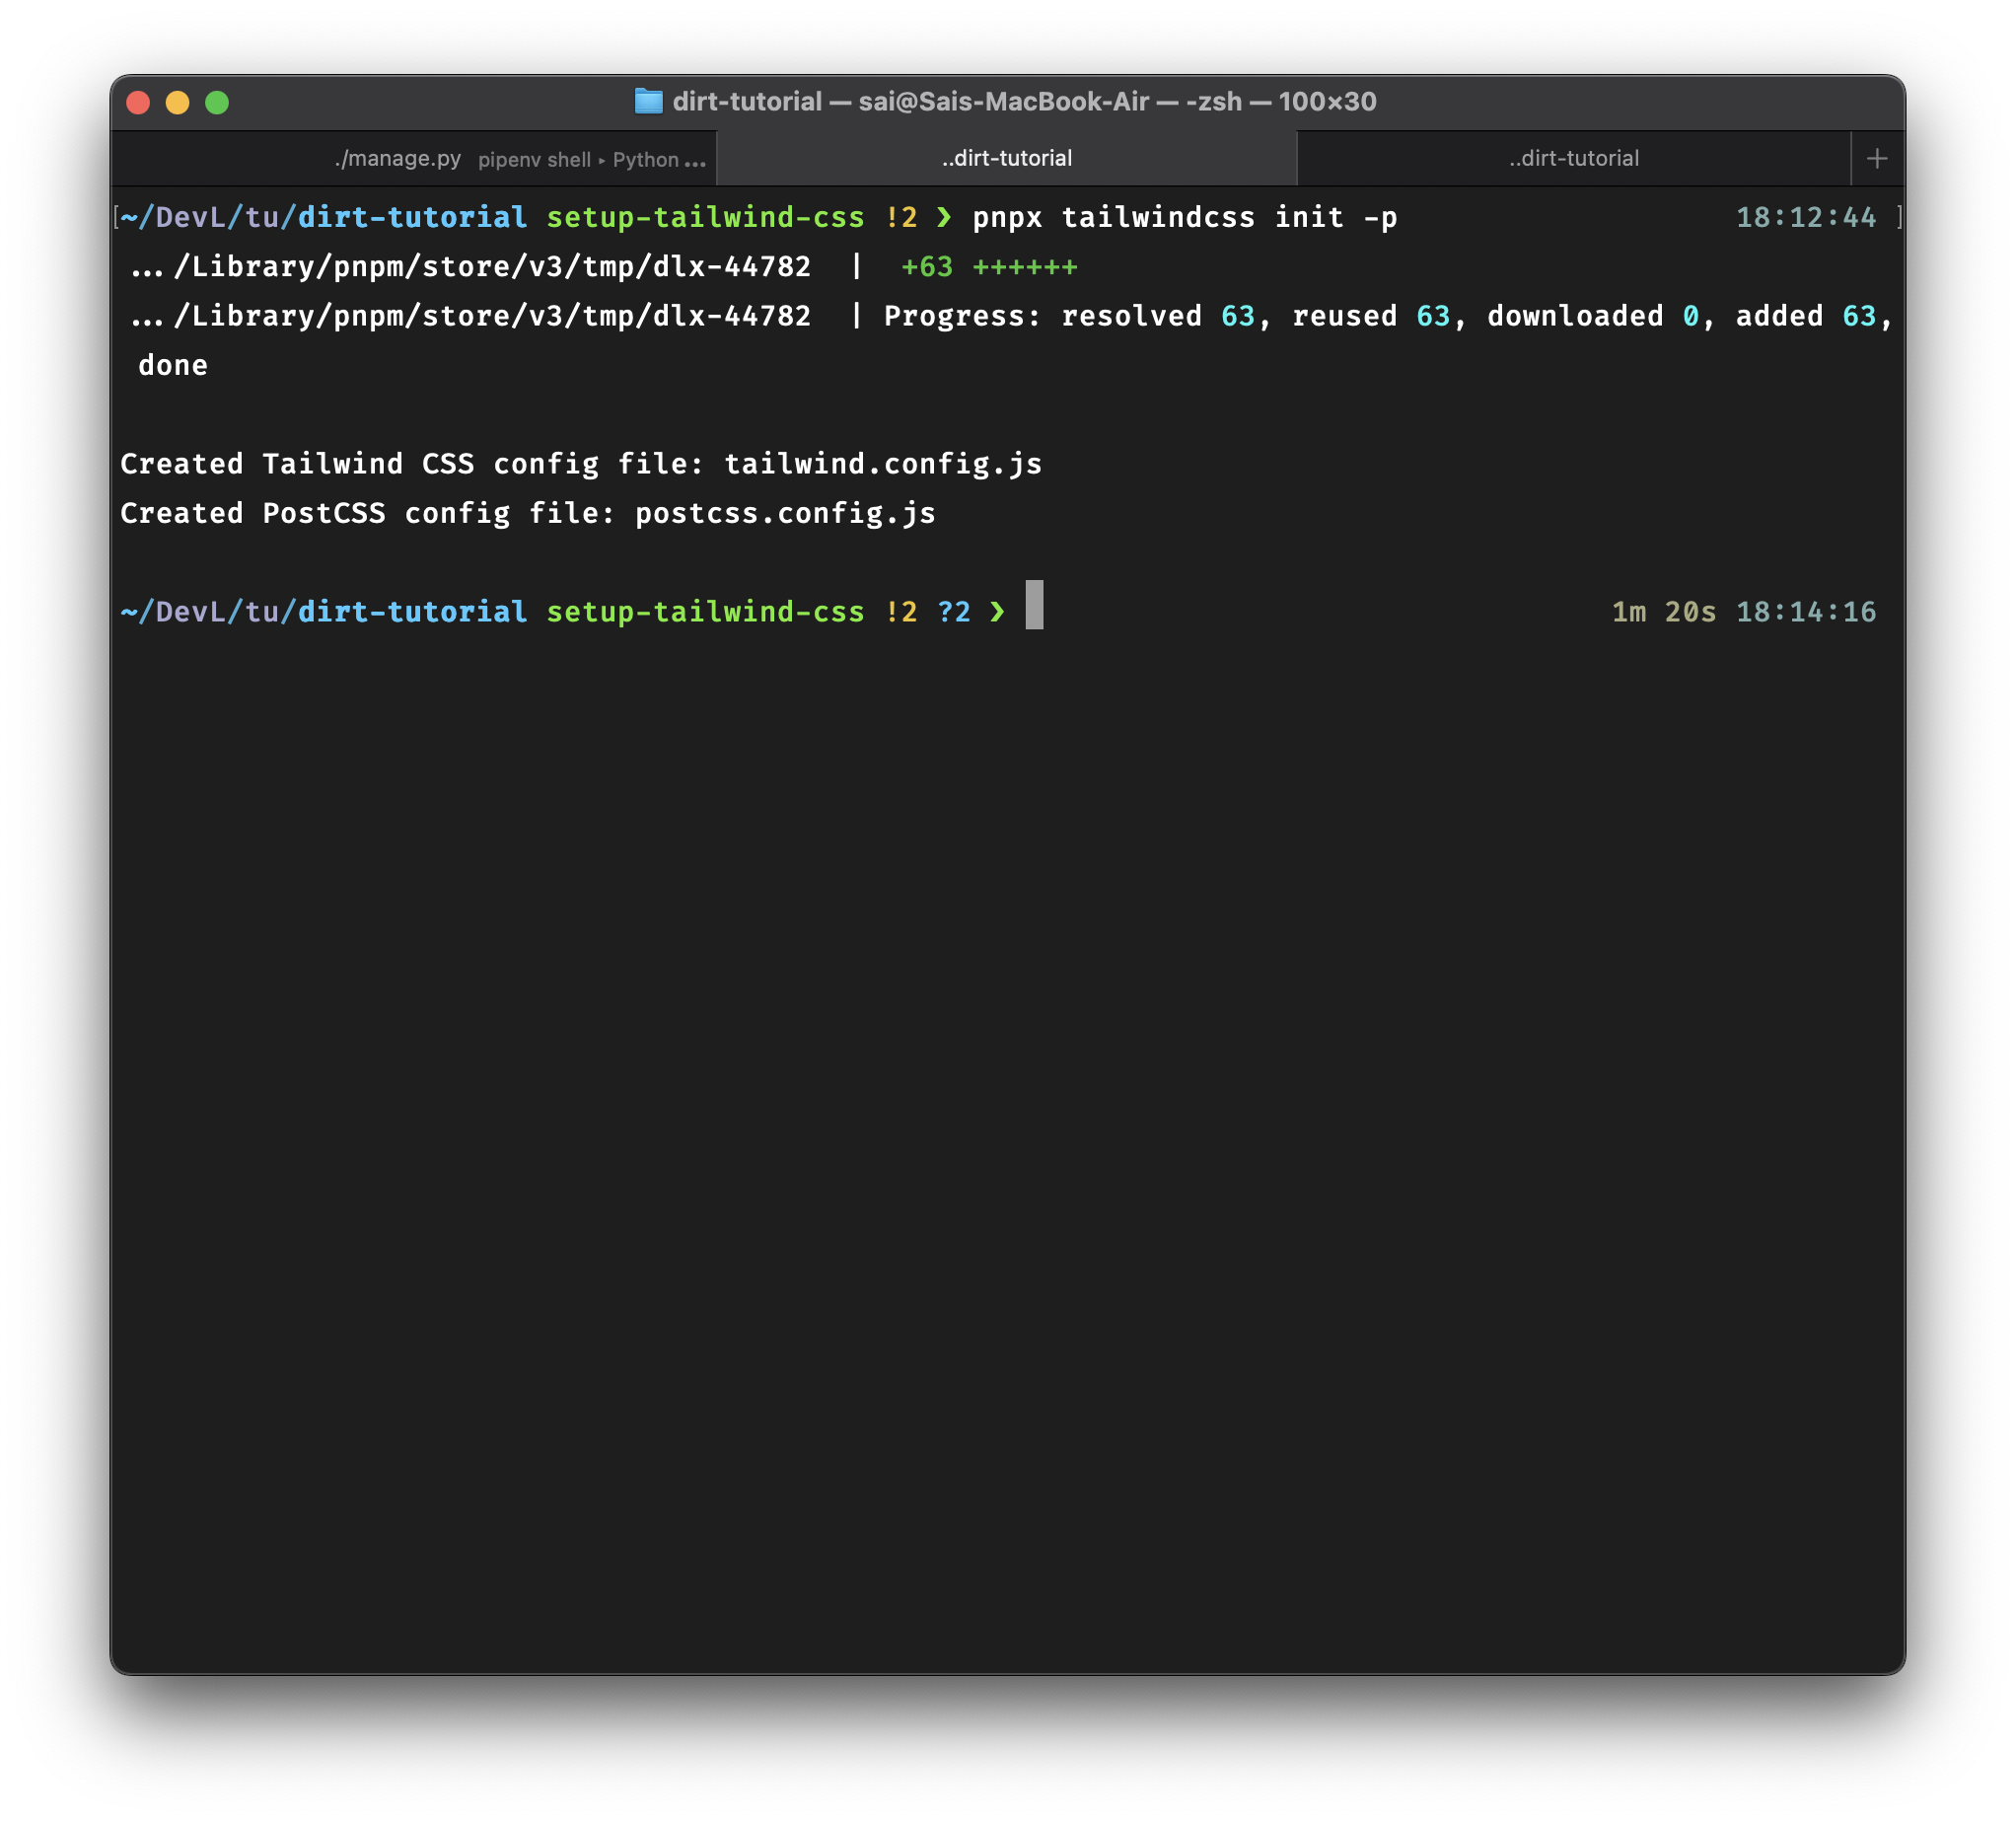
ℹ️ Be sure to add the generated files (postcss.config.js and tailwind.config.js) to version control
- Update the generated tailwind config
tailwind.config.jsas follows
/** @type {import('tailwindcss').Config} */
module.exports = {
  content: ['./templates/**/*.html', './react-app/src/**/*.{js,jsx,ts,tsx}'],
  theme: {
    extend: {},
  },
  plugins: [],
};
Create a
staticdirectory at the root of the projectCreate our main CSS file
./static/css/main.cssand add the following
@tailwind base;
@tailwind components;
@tailwind utilities;
- update
package.jsonto include a script that will runtailwindcssandviteviaconcurrently
"scripts": {
  "vite-build": "vite build",
  "vite-dev": "vite",
  "tailwind-dev": "tailwindcss -i ./static/css/main.css -o ./static/dist/css/app.css --watch",
  "dirt-dev": "concurrently \"npm run tailwind-dev\" \"npm run vite-dev\" ",
  "test": "echo \"Error: no test specified\" && exit 1"
},
- Update our
settings.pyfile so that we can serve our static files
# Name of our static files' folder (after called python manage.py collectstatic)
# STATIC_ROOT = BASE_DIR / 'static'  # <- remove this

# Include DJANGO_VITE_ASSETS_PATH into STATICFILES_DIRS to be copied inside
# when run command python manage.py collectstatic
STATICFILES_DIRS = [
    BASE_DIR / 'static',
    DJANGO_VITE_ASSETS_PATH
]
- Update our base template
./templates/base.htmlto include the link to generated CSS.
{% load static %}
{% load django_vite %}
<!DOCTYPE html>
<html lang="en">
    <head>
        <meta charset="UTF-8">
        <meta name="viewport" content="width=device-width, initial-scale=1"/>
        <!-- css -->
        <link rel="stylesheet" href="{% static 'dist/css/app.css' %}" />
        <!-- vite hmr -->
        {% vite_hmr_client %}
        {% vite_asset 'src/main.jsx' %}
        <title>D.I.R.T Stack - Django Inertia React Tailwind CSS</title>
    </head>
    <body>
        <!-- inertia -->
        {% block inertia %}{% endblock %}
    </body>
</html>
- run our newly added script via
pnpm
pnpm run dirt-dev
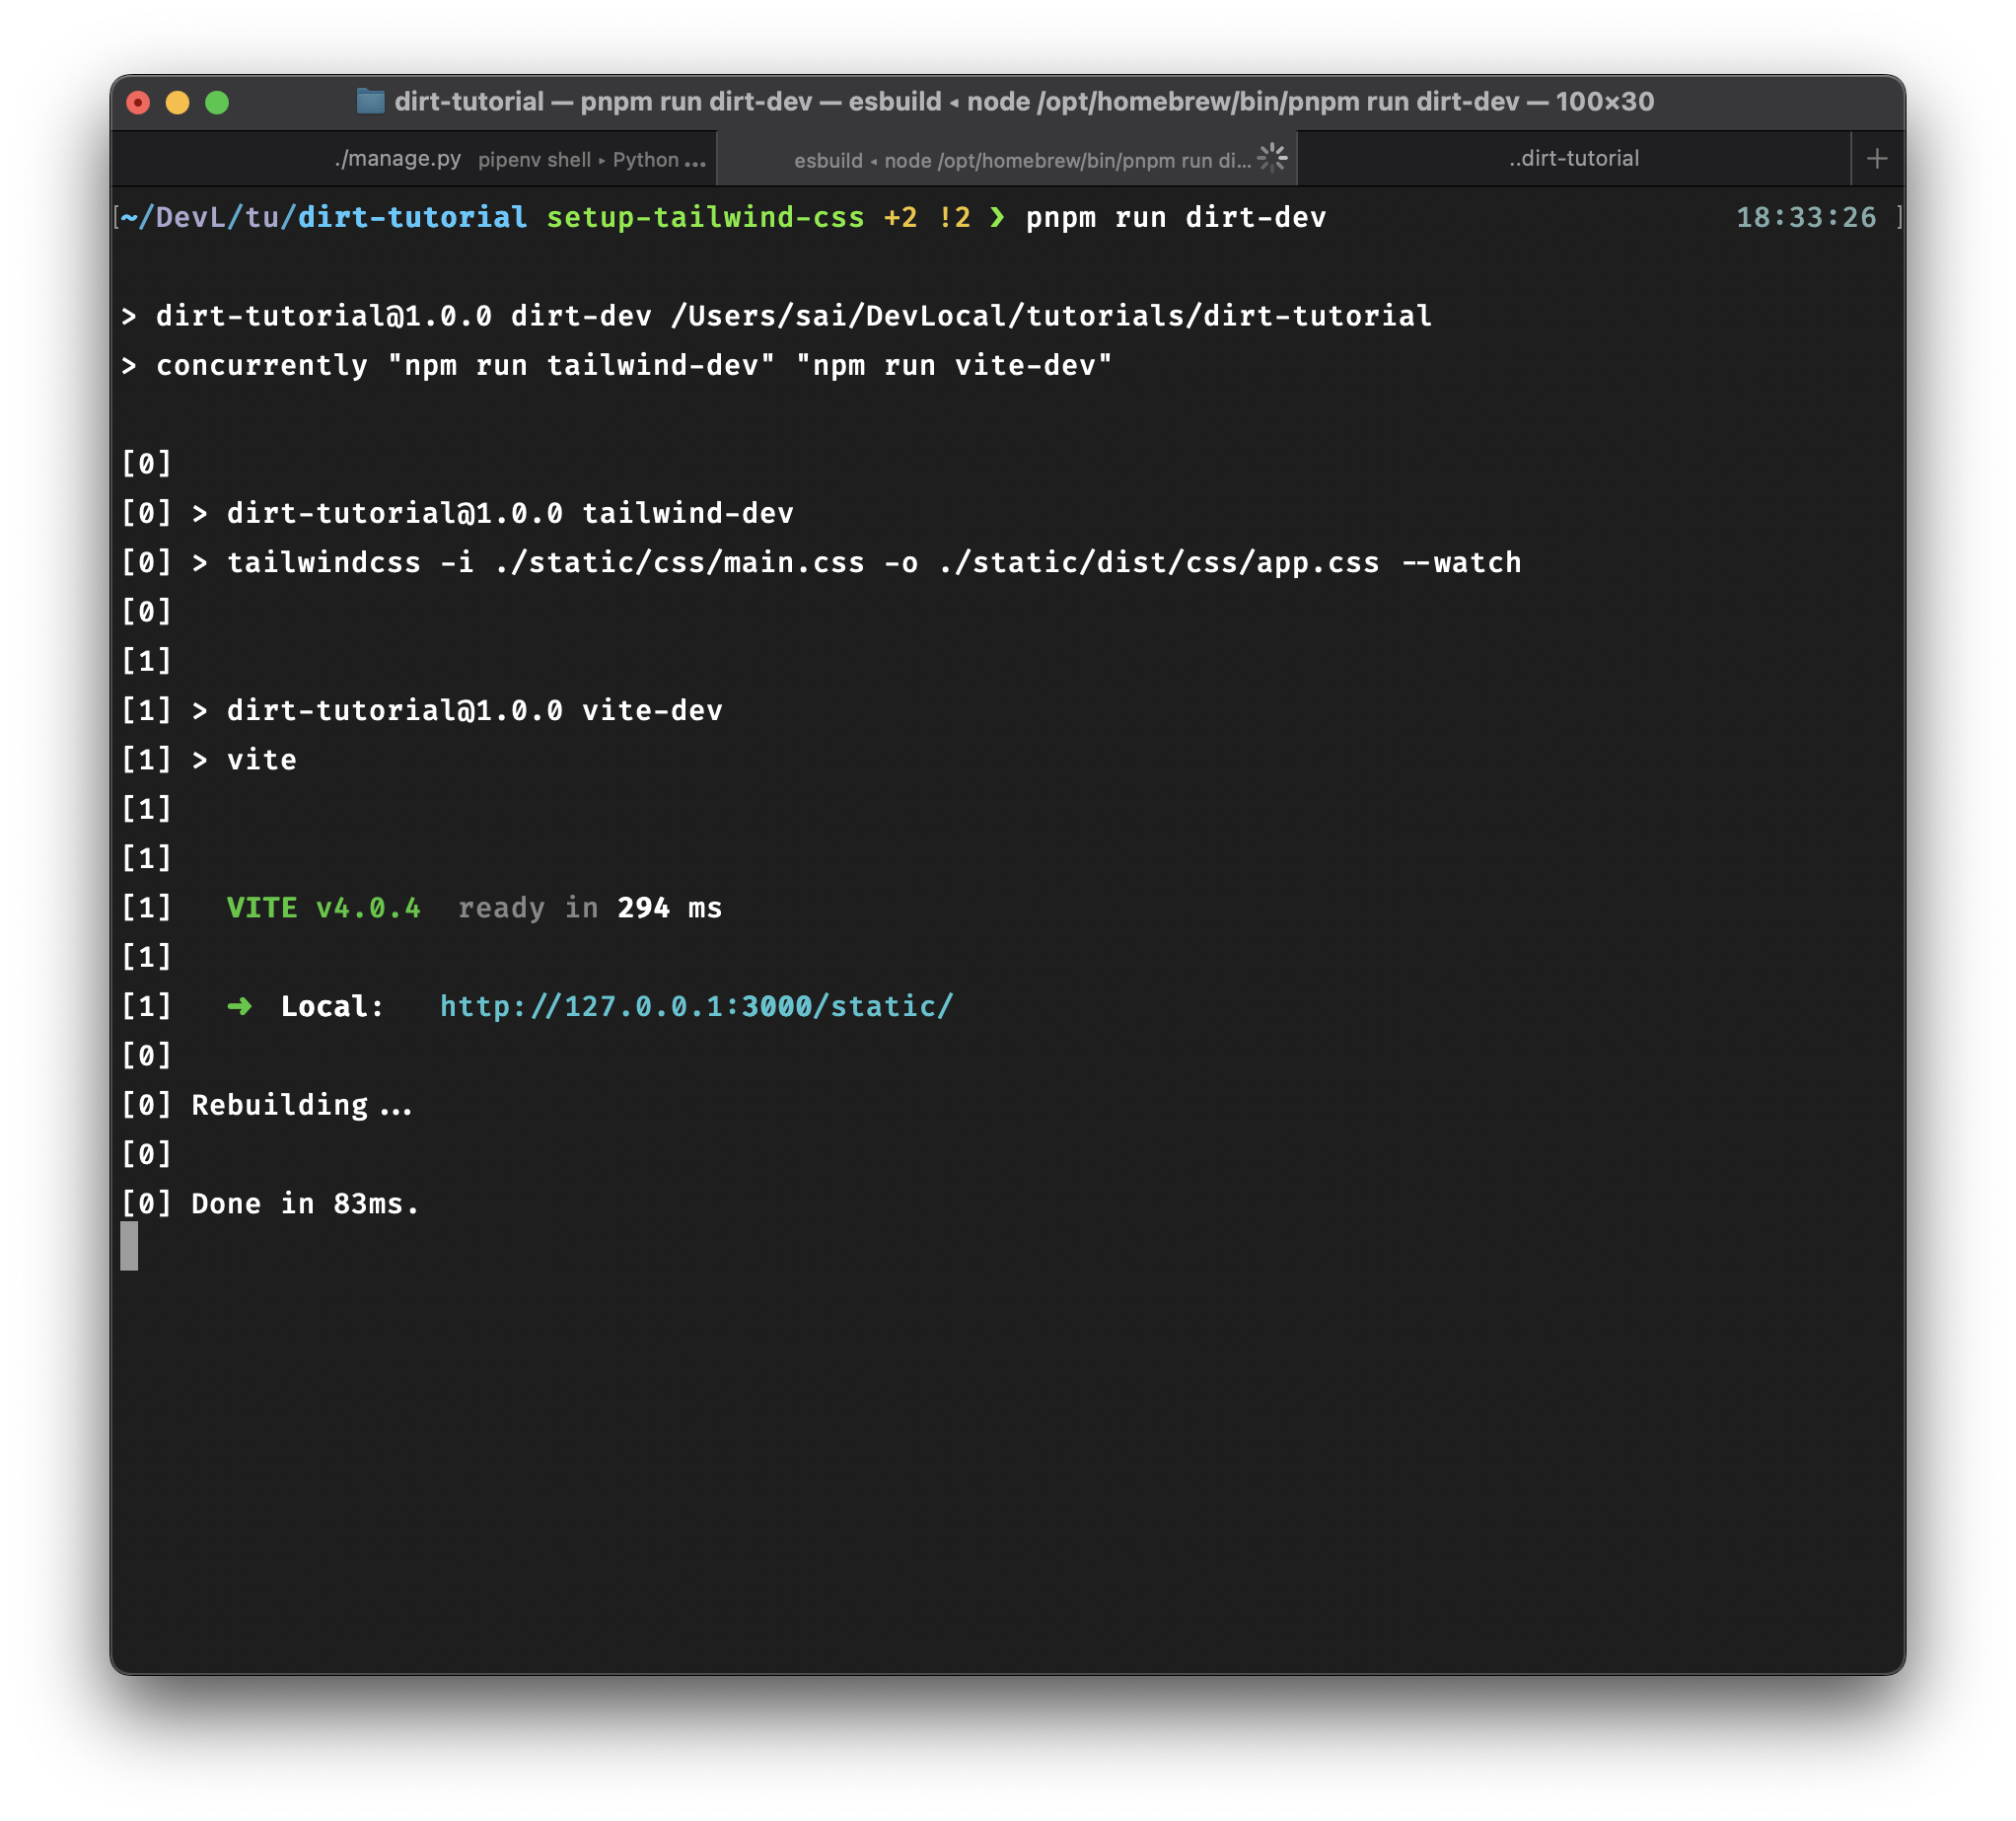
✅ Should work without issues
- Edit our Index component
./react-app/src/page/Home/Index.tsxto include some Tailwind CSS classes
import * as React from 'react';
const Index = (): React.ReactNode => {
  return (
    <div className="flex flex-col gap-y-4 p-2">
      <h1 className="text-blue-800 text-4xl">D.I.R.T Stack Tutorial</h1>
      <div className="bg-blue-100 border-blue-800 border-2 flex flex-col p-4 rounded">
        <p className="text-blue-800 text-lg">The D.I.R.T Stack consists of 4 major pieces</p>
      </div>
      <ul className="text-2xl">
        <li><span className="font-semibold">D</span>jango</li>
        <li><span className="font-semibold">I</span>nertia</li>
        <li><span className="font-semibold">R</span>eact</li>
        <li><span className="font-semibold">T</span>ailwind CSS</li>
      </ul>
    </div>
  )
}

export default Index;
Not bad so far, right? So, in summary here’s a rundown of what we have done so far
Setup a base Django project
Setup Inertia
Setup React with Vite
Install and configure Tailwind CSS
At this point, we can go ahead and commit our changes so that we can proceed to the next section.
Bonus: Storybook Integration (Experimental)
Now, you guys know I am a fan of tools that allow for the previewing of components as we build them.
We’ll be using Storybook which is one of my favorite tools. For more information about Storybook, click here. And with the integration of Storybook, we can call this D.I.R.T+.
⚠️ Important Note: For Storybook to work with our D.I.R.T Stack, do not use the installation instructions provided by Storybook as our project does not conform to a typical structure.
Storybook Manual Setup
To get Storybook working, a manual setup is required. The steps are below
Create a new branch for this section
Install the dependencies
# storybook manual setup

# add dependencies via PNPM or NPM or Yarn
pnpm add -D @storybook/builder-vite @storybook/react @storybook/client-api @storybook/client-logger
@storybook/addon-links @storybook/addon-essentials @storybook/addon-docs
@storybook/addon-actions @storybook/addon-backgrounds @storybook/addon-measure
@storybook/addon-outline @babel/core@^7.0.0
- Create a Storybook config file
.storybook/main.jsat the root of the project and paste the following
// .storybook/main.js

module.exports = {
  stories: [
    '../react-app/src/**/*.stories.mdx',
    '../react-app/src/**/*.stories.@(js|jsx|ts|tsx)',
  ],
  addons: ['@storybook/addon-links', '@storybook/addon-essentials'],
  core: {
    builder: '@storybook/builder-vite',
  },
};
- Create a preview file for Storybook
./storybook/preview.js
import "../static/dist/css/app.css";

export const parameters = {
  actions: { argTypesRegex: "^on[A-Z].*" },
  controls: {
    matchers: {
      color: /(background|color)$/i,
      date: /Date$/,
    },
  },
}
- Update
package.jsonto include a script to startStorybook.
{
    "scripts": {
        /* other scripts removed to save space. copy line below */
        "storybook": "start-storybook -p 6006"
    }
}
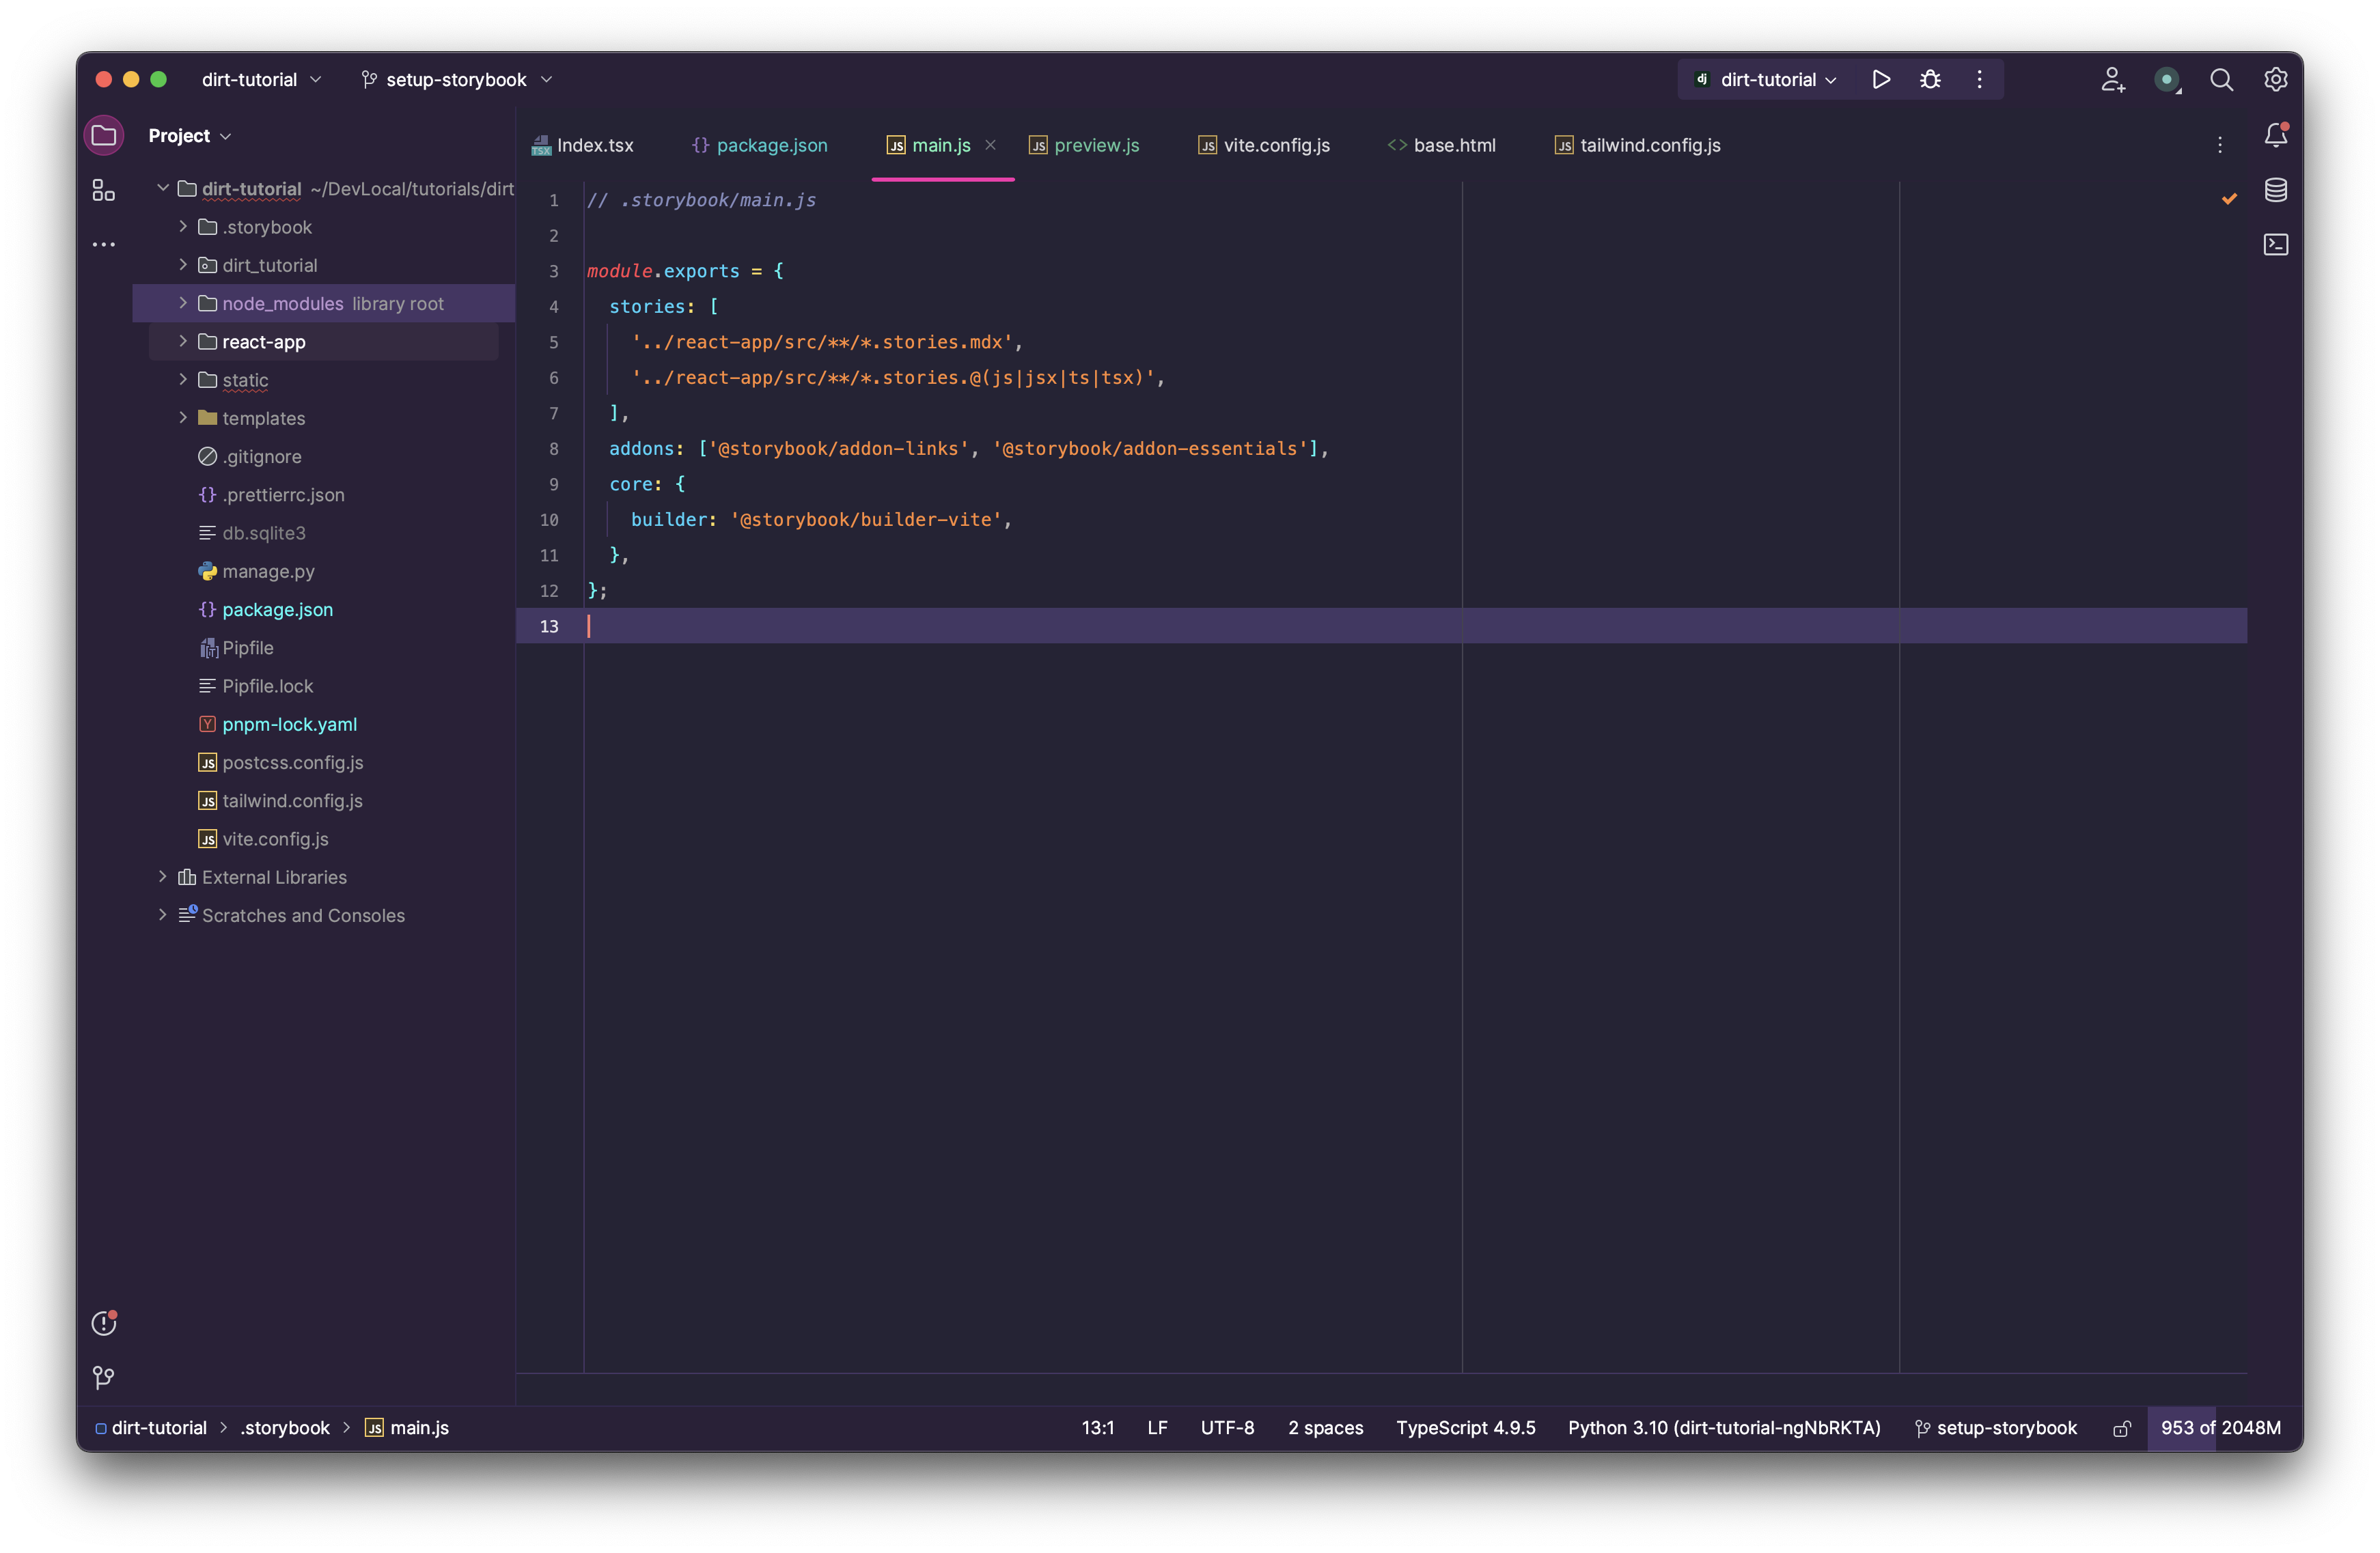
main.js created showing contents
- Run storybook via
pnpm
pnpm run storybook
ℹ️ If everything worked, then a new browser tab should open with StoryBook. At this point, since we don’t have any stories, we will be greeted with a message telling us that we don’t have any stories.
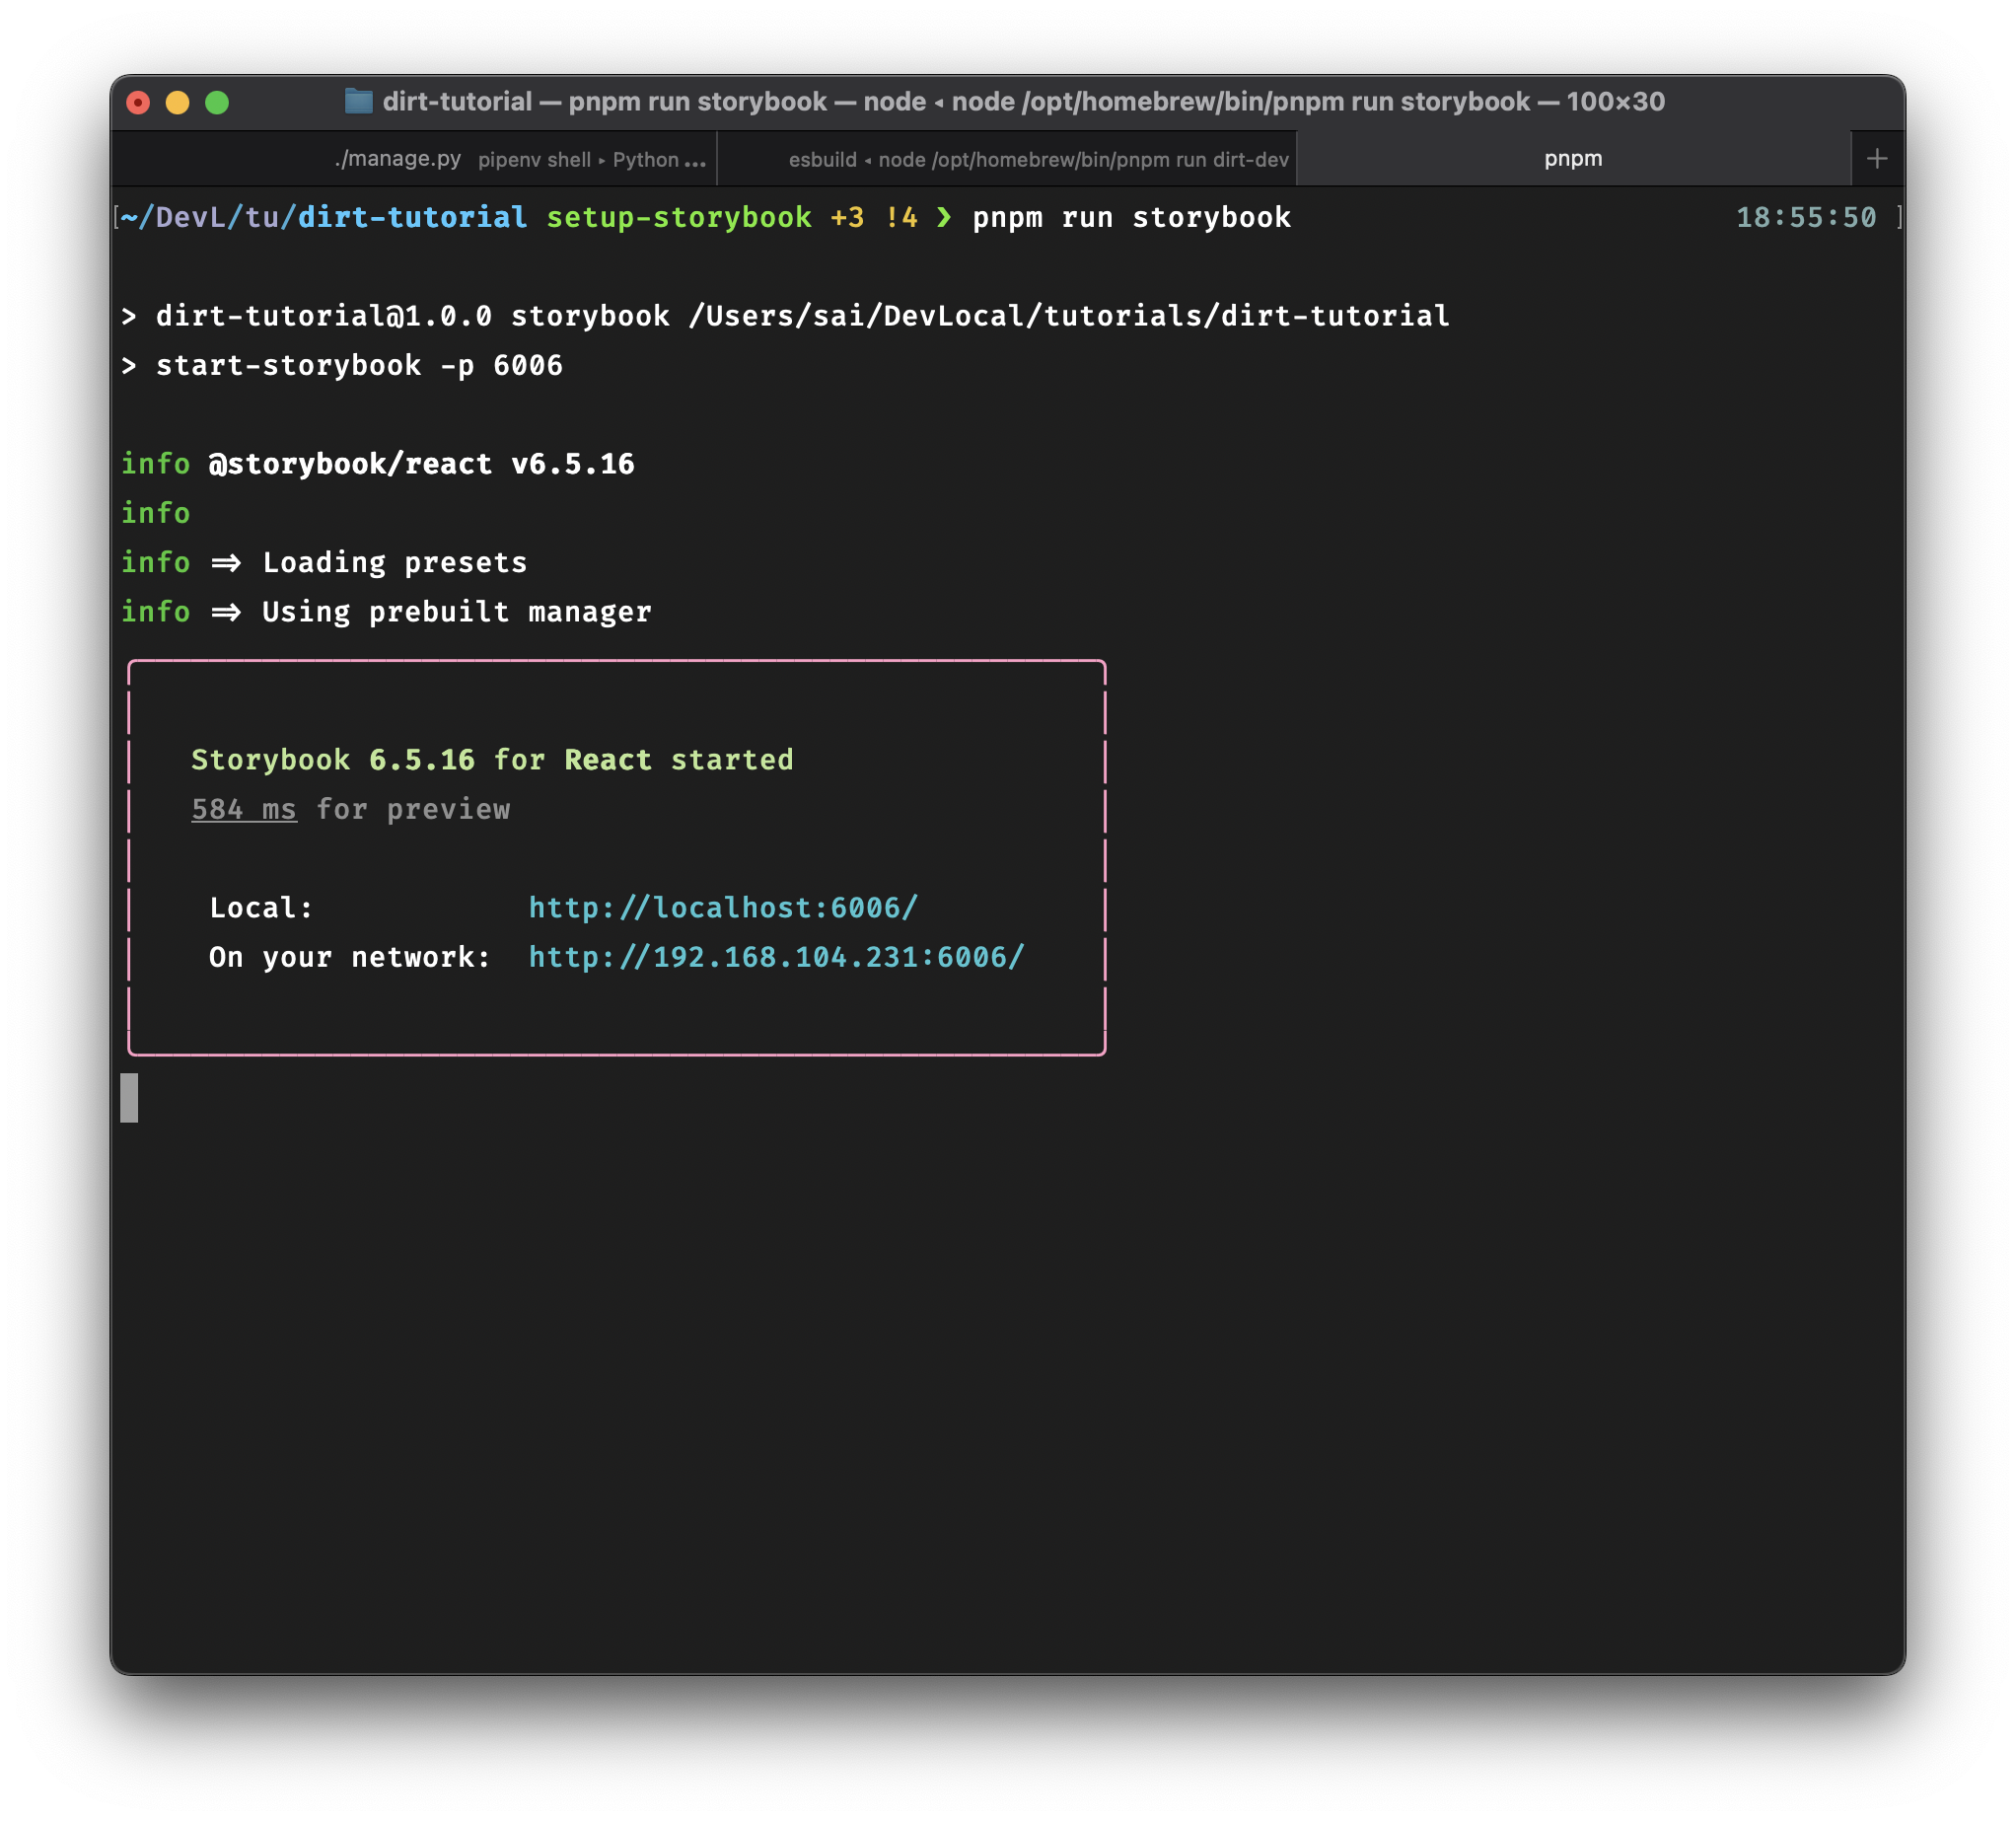
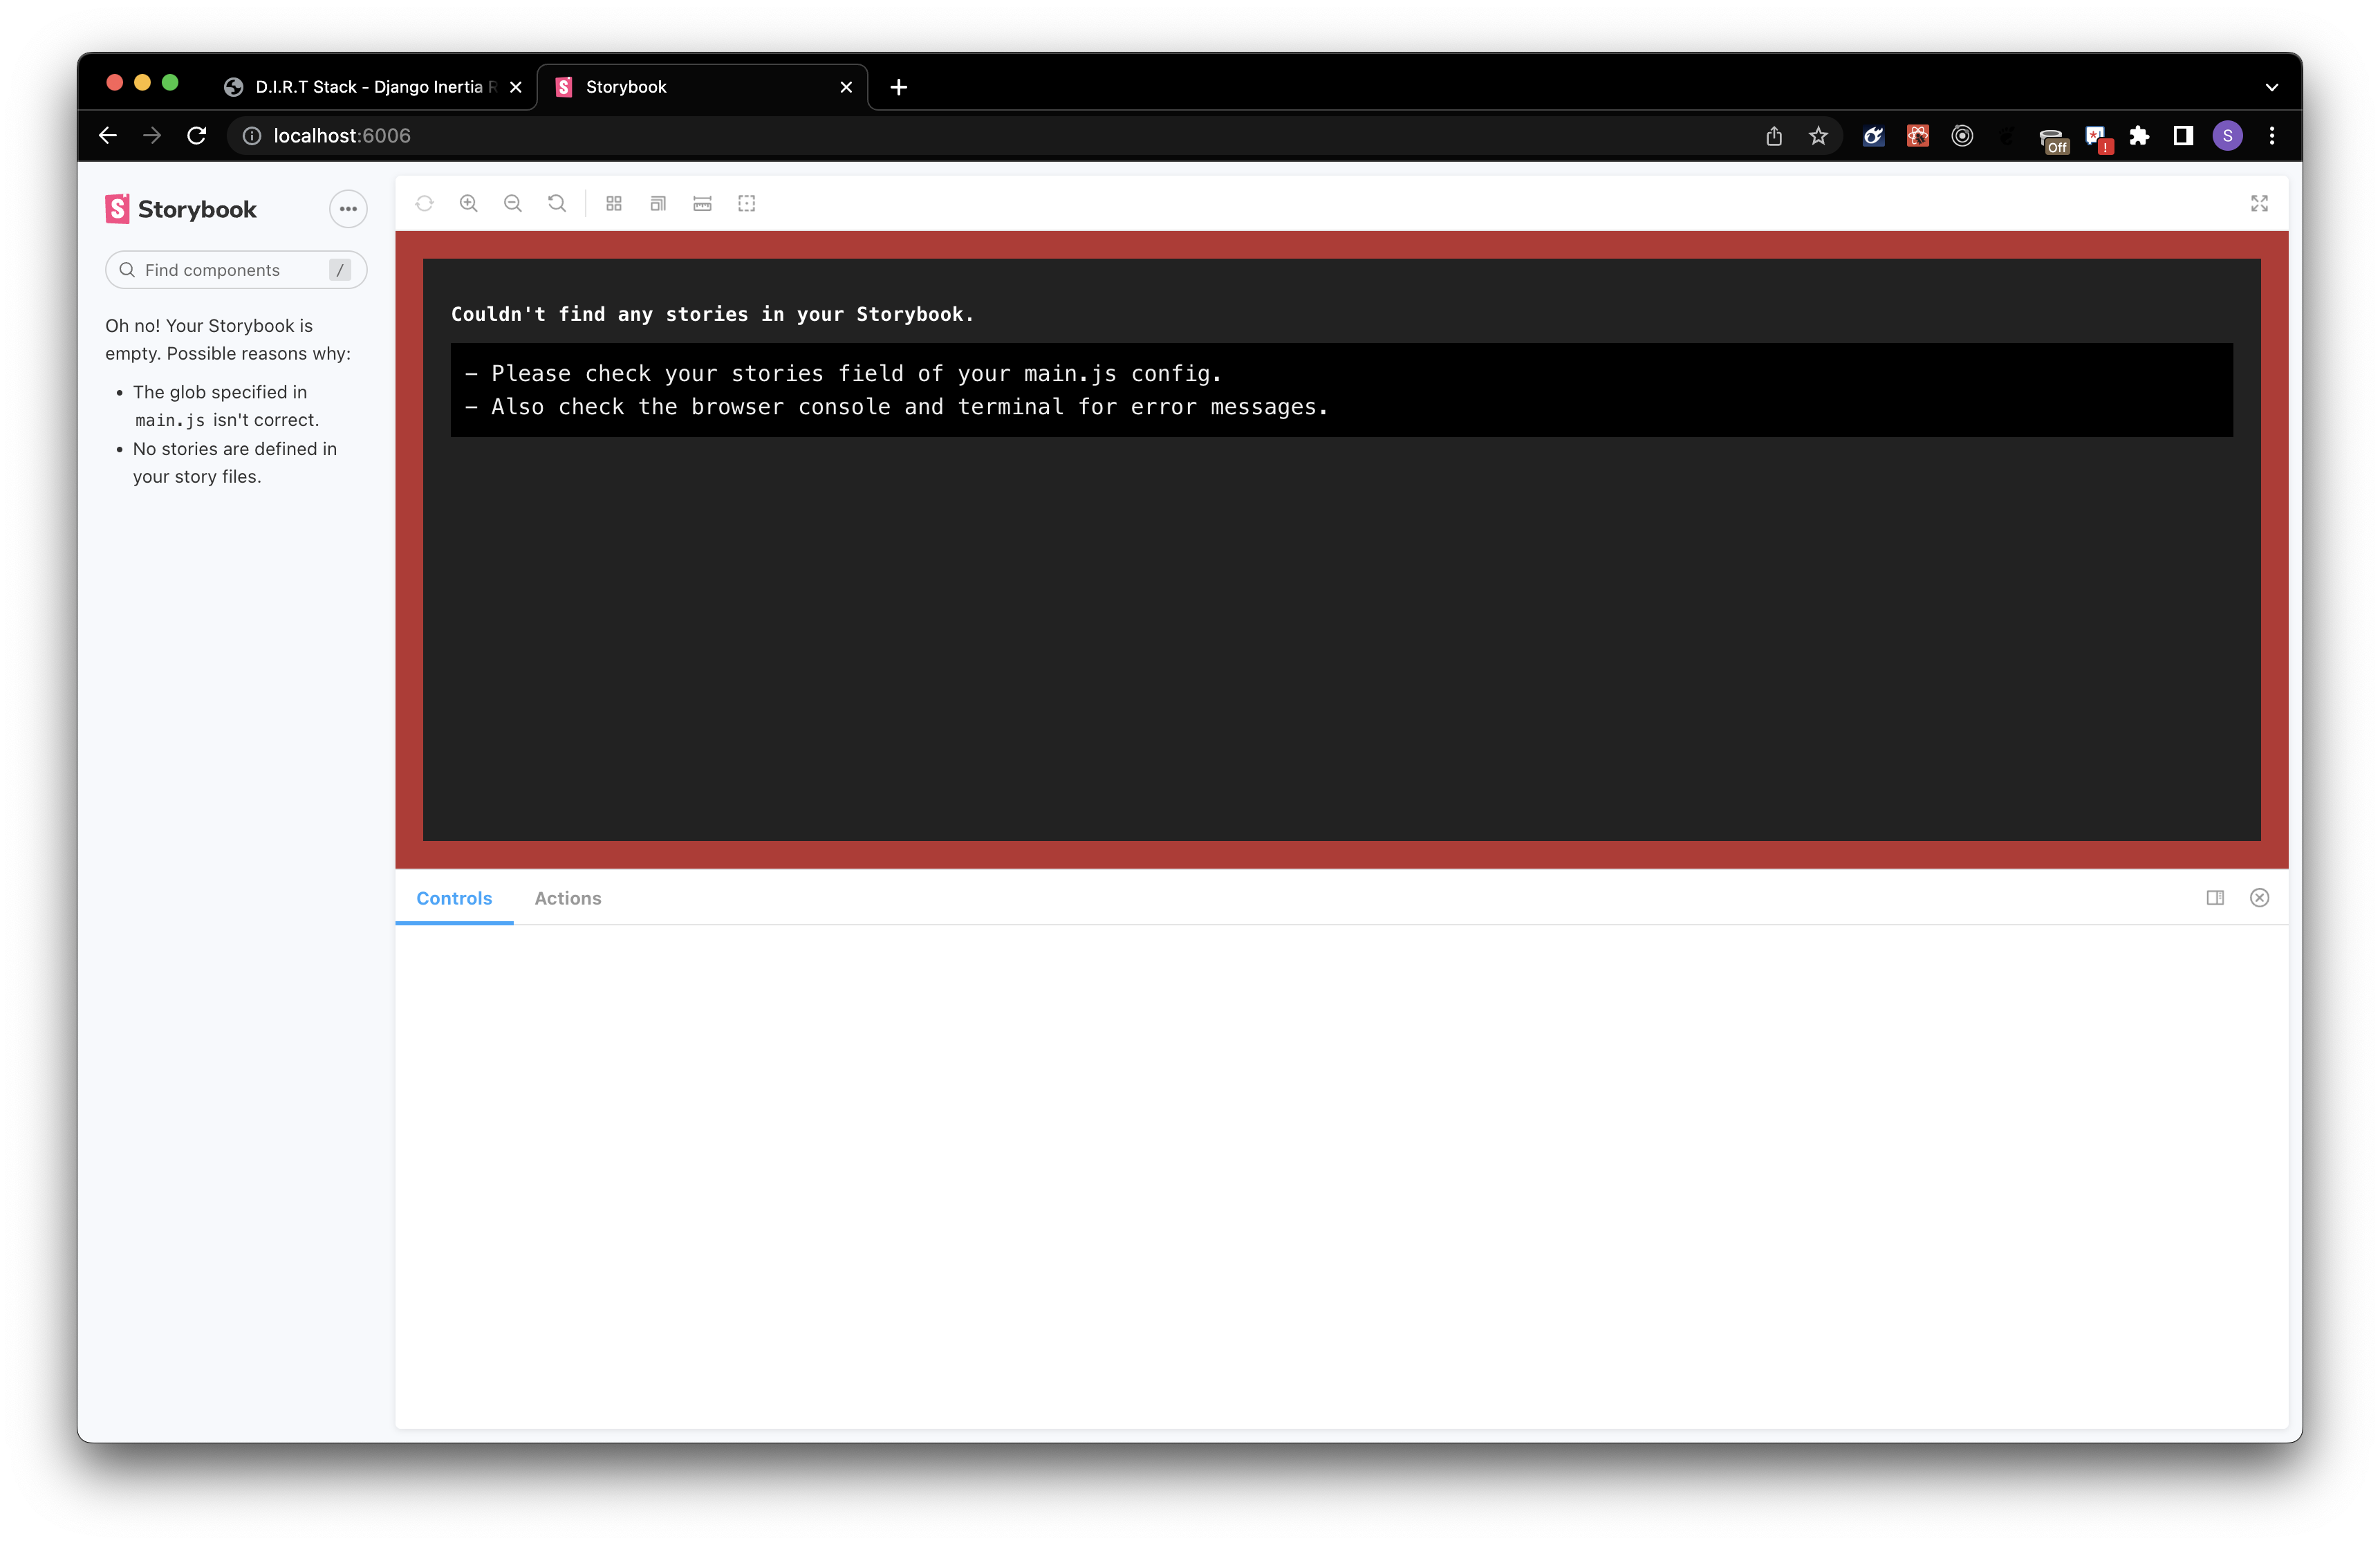
You’ll notice that Storybook isn’t too happy with us since we have no stories defined. So we’ll have to fix that. Let’s proceed.
Creating our first story
At this point, we can create stories based on components. For this, we will create a few components and the accompanying story files.
Before we do that, let’s get a few things installed.
- Install
headlessuivia pnpm.
pnpm add -d @headlessui/react
- Create a Button component
./react-app/src/components/shared/Button/Button.tsx
import * as React from 'react';
import type { FC, ButtonHTMLAttributes } from 'react';

interface ButtonProps extends ButtonHTMLAttributes<HTMLButtonElement> {
  labelText: string;
  overrideButtonClass?: string;
}

export const Button: FC<ButtonProps> = ({
  labelText,
  overrideButtonClass,
  ...props
}) => {
  return (
    <button
      className={[
        'px-4 py-2 bg-green-800 hover:bg-green-600 text-white text-lg rounded duration-200',
        overrideButtonClass,
      ].join(' ')}
      {...props}
    >
      {labelText}
    </button>
  );
};
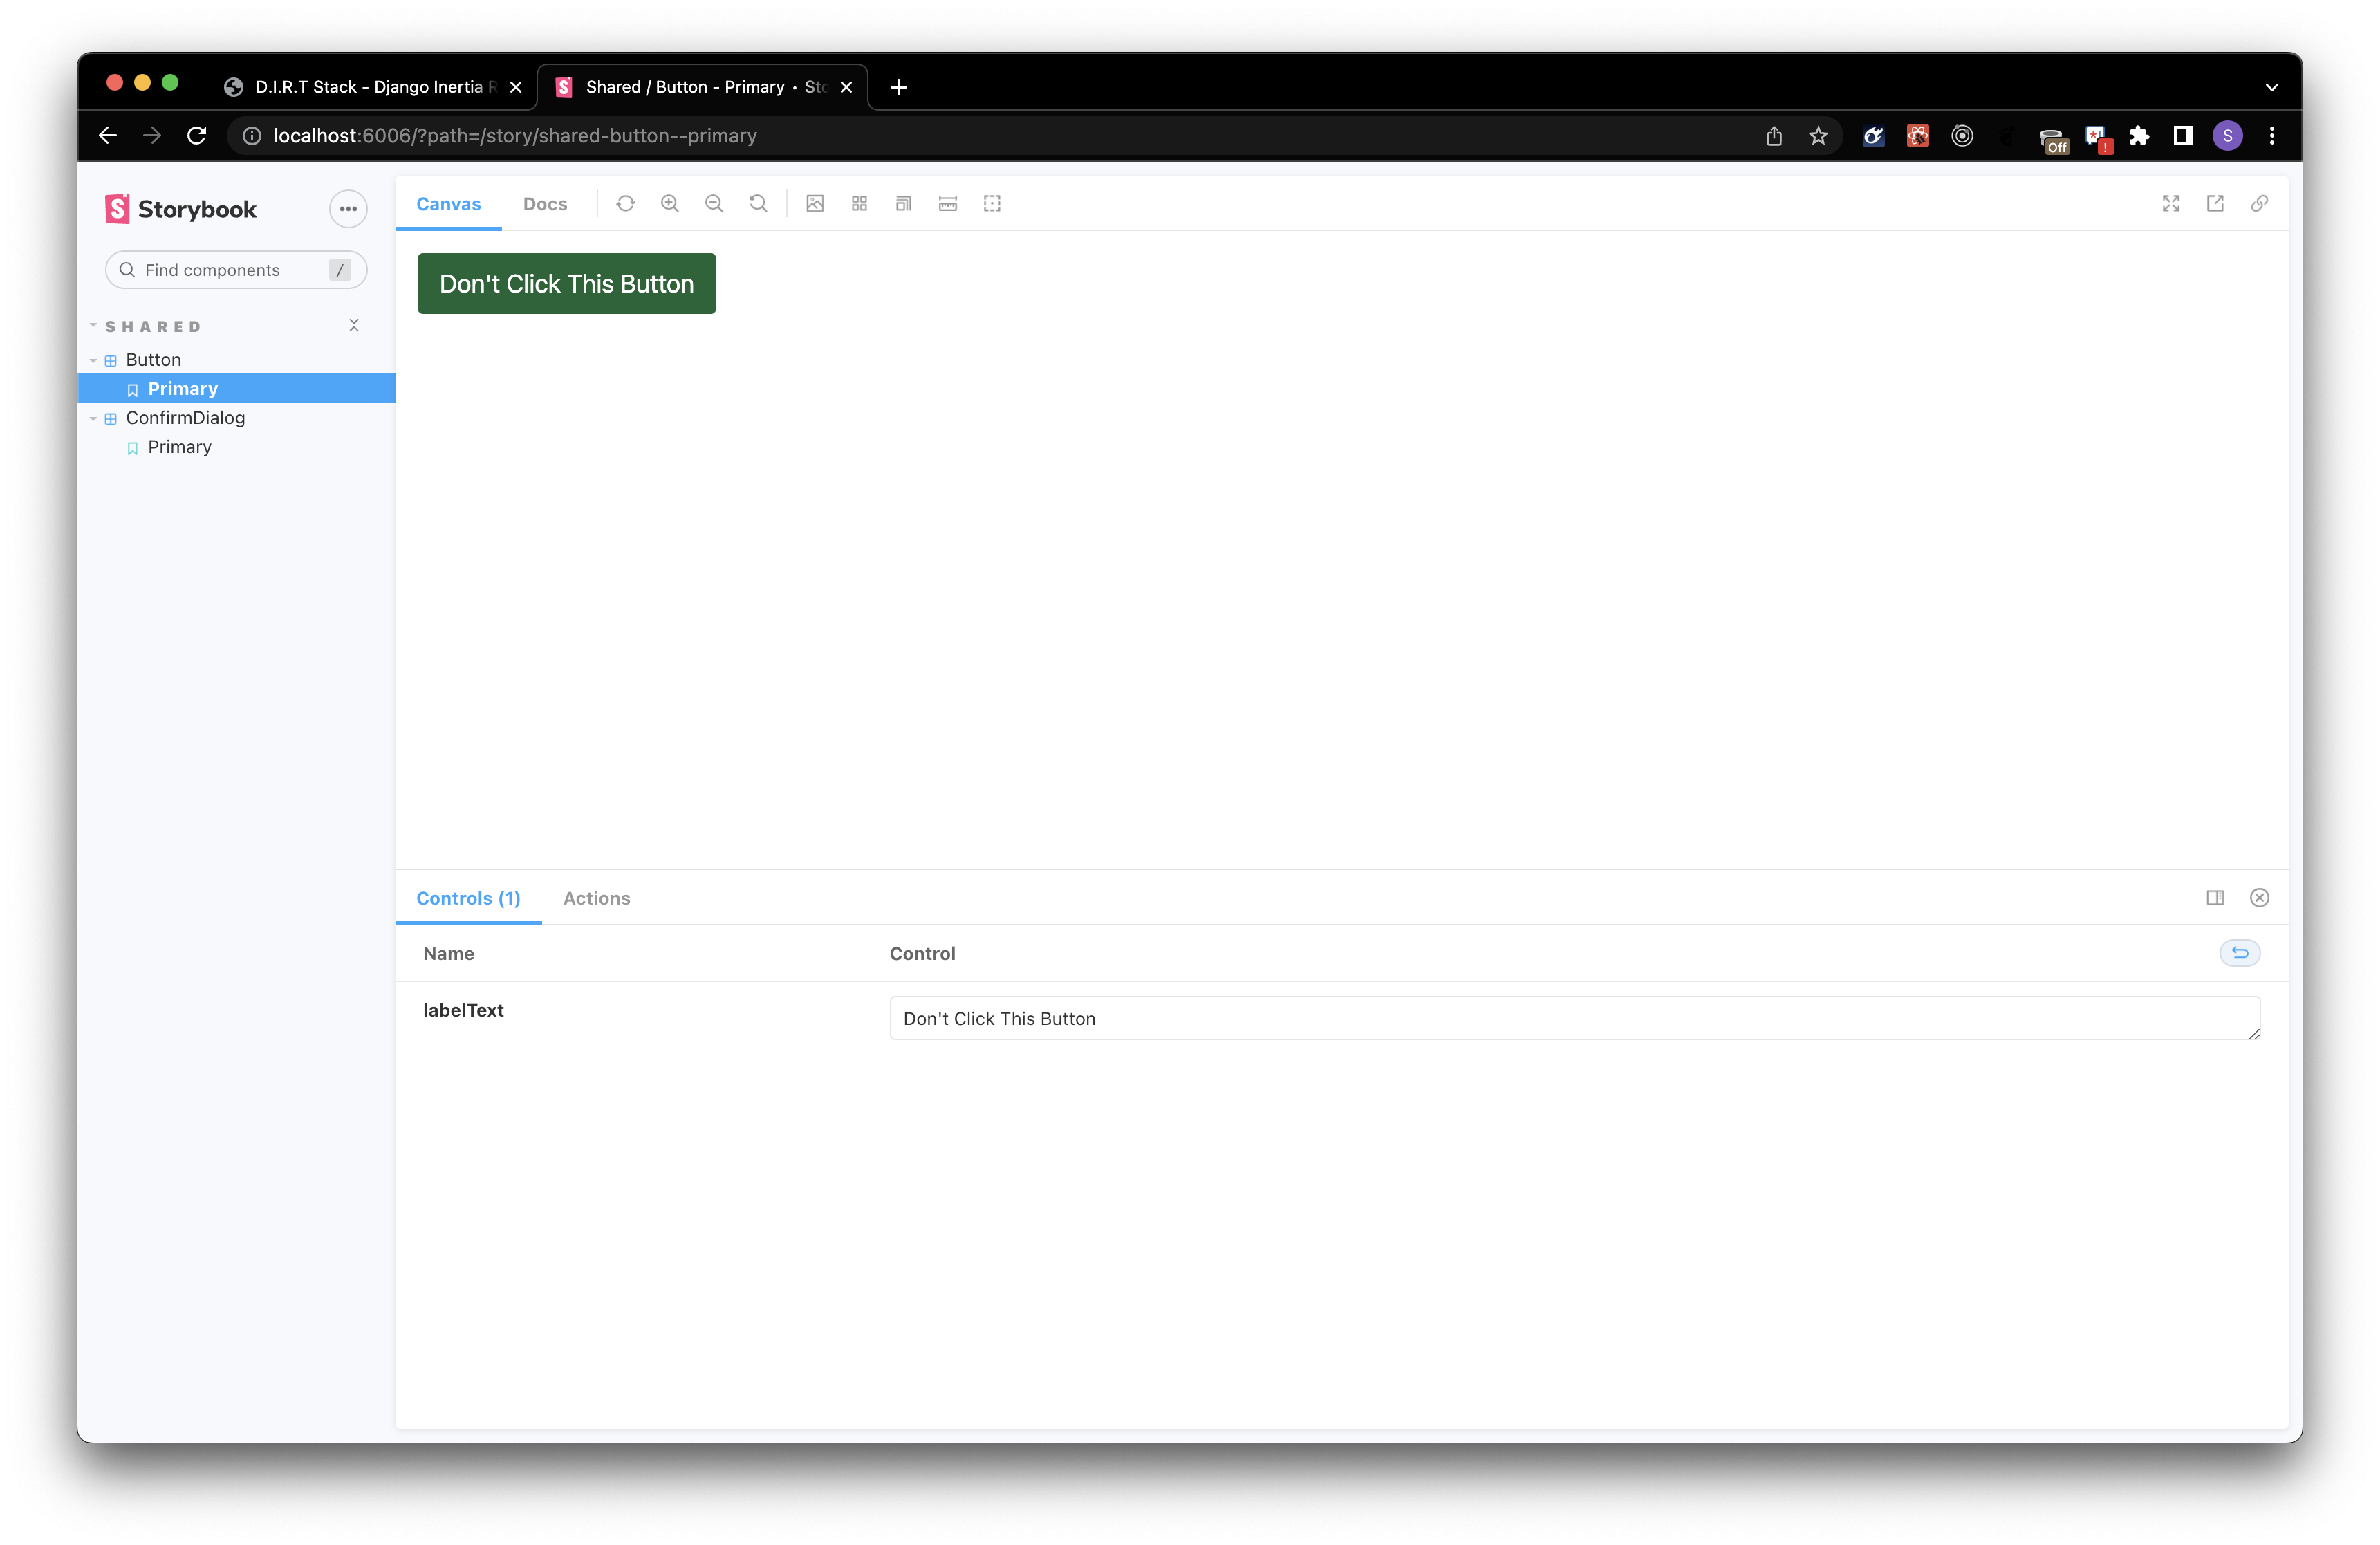
- Create the corresponding Storybook file adjacent to the Button component
Button.stories.tsx
import type {ComponentMeta, ComponentStory} from '@storybook/react';
import {Button} from './Button';

export default {
  title: 'Shared/Button',
  component: Button,
} as ComponentMeta<typeof Button>;

const Template: ComponentStory<typeof Button> = args => <Button {...args} />;

export const Primary = Template.bind({});
Primary.args = {
  labelText: 'Primary Button',
}
We should see our newly created Button story file as shown below
- Create a Confirm Dialog component
./react-app/src/components/shared/ConfirmDialog/ConfirmDialog.tsx
import * as React from 'react';
import type { FC } from 'react';
import { Dialog } from '@headlessui/react';
import { Button } from '../Button/Button';

interface ConfirmDialogProps {
  cancelAction: () => void;
  confirmAction: () => void;
  dialogTitle: string;
  overrideCancelText?: string;
  overrideConfirmText?: string;
  promptText: string;
  titleText: string;
  visible: boolean;
}

export const ConfirmDialog: FC<ConfirmDialogProps> = ({
  overrideConfirmText,
  overrideCancelText,
  promptText,
  titleText,
  confirmAction,
  visible,
  cancelAction,
}) => {
  return (
    <Dialog onClose={cancelAction} open={visible}>
      <div className="fixed inset-0 bg-black/30" aria-hidden="true" />
      <div className="fixed inset-0 flex items-center justify-center p-4">
        <Dialog.Panel className="mx-auto max-w-sm rounded bg-white p-4 rounded">
          <div className="flex flex-col items-center">
            <Dialog.Title className="font-normal text-2xl text-slate-600 ml-0">
              {titleText}
            </Dialog.Title>
          </div>
          <div className="mt-2">
            <p className="text-center text-lg text-slate-600">{promptText}</p>
          </div>
          <div className="flex flex-1 flex-col mt-6 items-center">
            <div className="flex gap-x-2">
              <Button
                onClick={cancelAction}
                overrideButtonClass="bg-slate-800 hover:bg-slate-500"
                labelText={overrideCancelText ? overrideCancelText : 'Cancel'}
              />
              <Button
                onClick={confirmAction}
                labelText={
                  overrideConfirmText ? overrideConfirmText : 'Confirm'
                }
              />
            </div>
          </div>
        </Dialog.Panel>
      </div>
    </Dialog>
  );
};
- Create the corresponding Storybook file adjacent to Confirm Dialog component
ConfirmDialog.stories.tsx
import type { ComponentMeta, ComponentStory } from '@storybook/react';
import { ConfirmDialog } from './ConfirmDialog';
export default {
title: 'Shared/ConfirmDialog',
component: ConfirmDialog,
} as ComponentMeta<typeof ConfirmDialog>;
const Template: ComponentStory<typeof ConfirmDialog> = (args) => (
<ConfirmDialog {...args} />
);
export const Primary = Template.bind({});
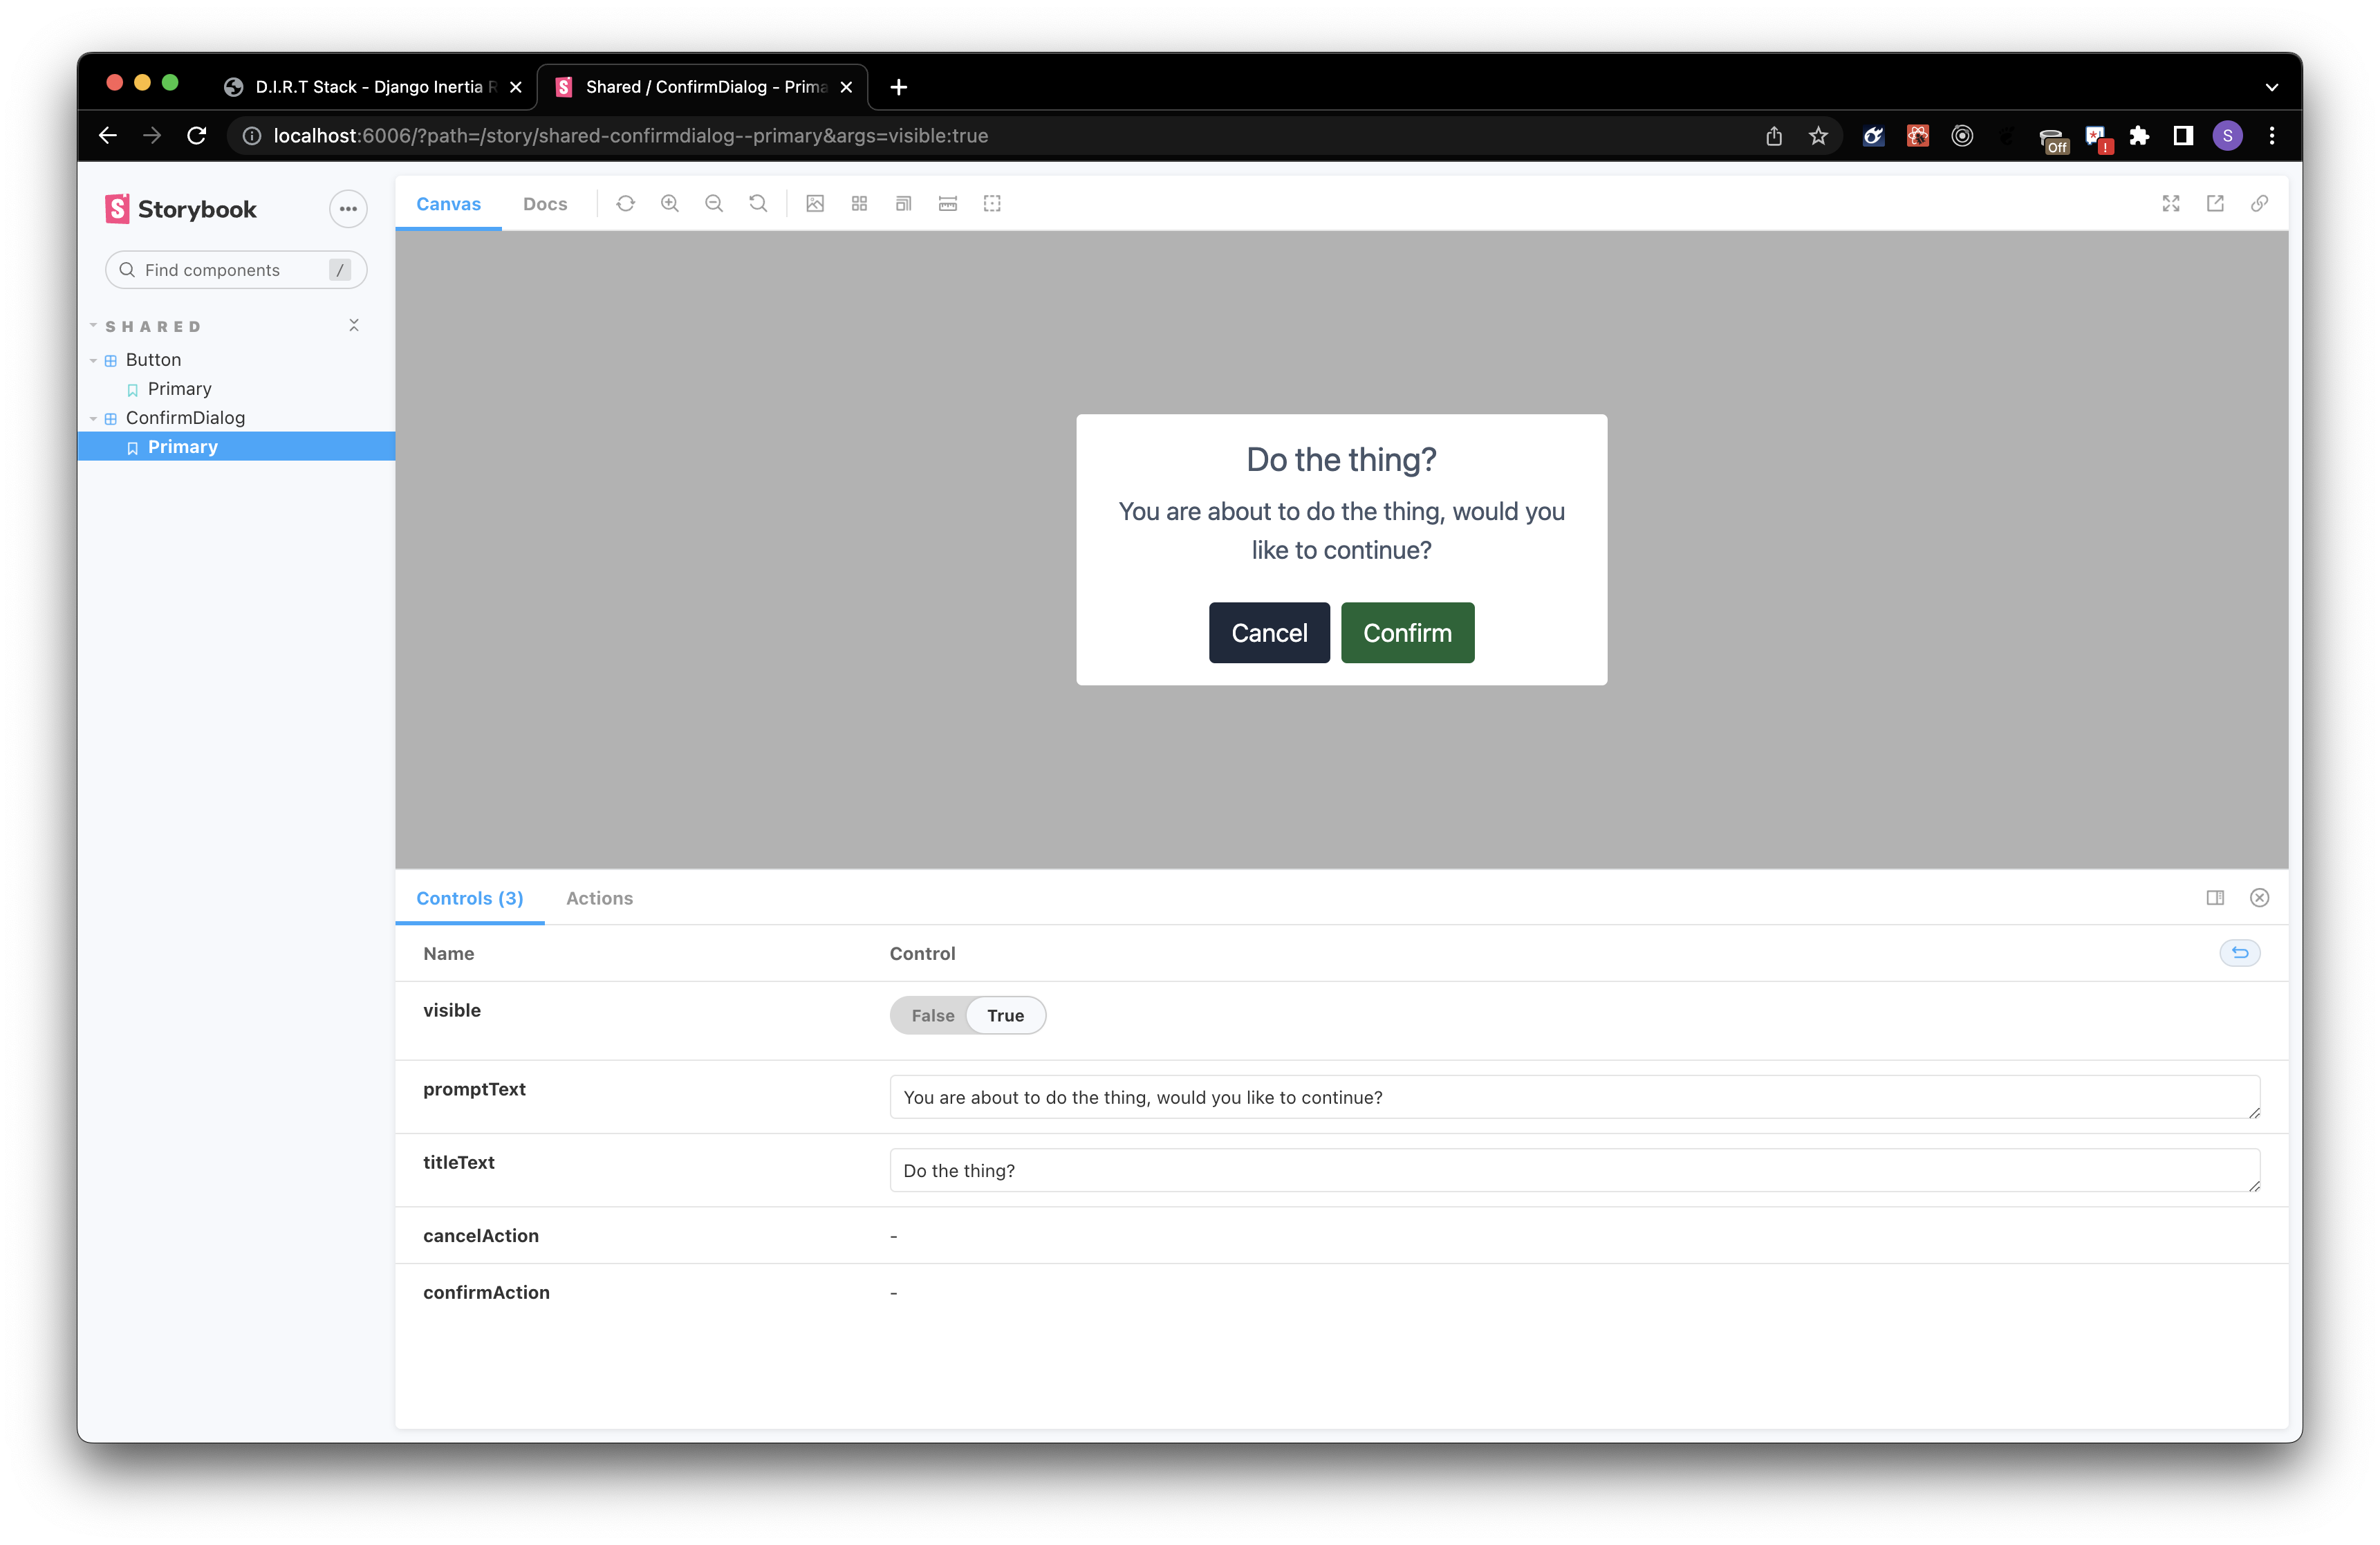
Primary.args = {
visible: false,
promptText: 'You are about to do the thing, would you like to continue?',
titleText: 'Do the thing?',
cancelAction: () => {},
confirmAction: () => {},
};
We should see our newly created Confirm Dialog story below
If everything worked, then we can celebrate 🎉. This concludes the D.I.R.T+ Stack setup with Storybook.
⚠️ Currently there is an issue with Storybook that requires the page to be reloaded manually. So, if you see something that looks like the screen below when adding a new story file, just reload it (for now). I’m looking for a solution to this issue.
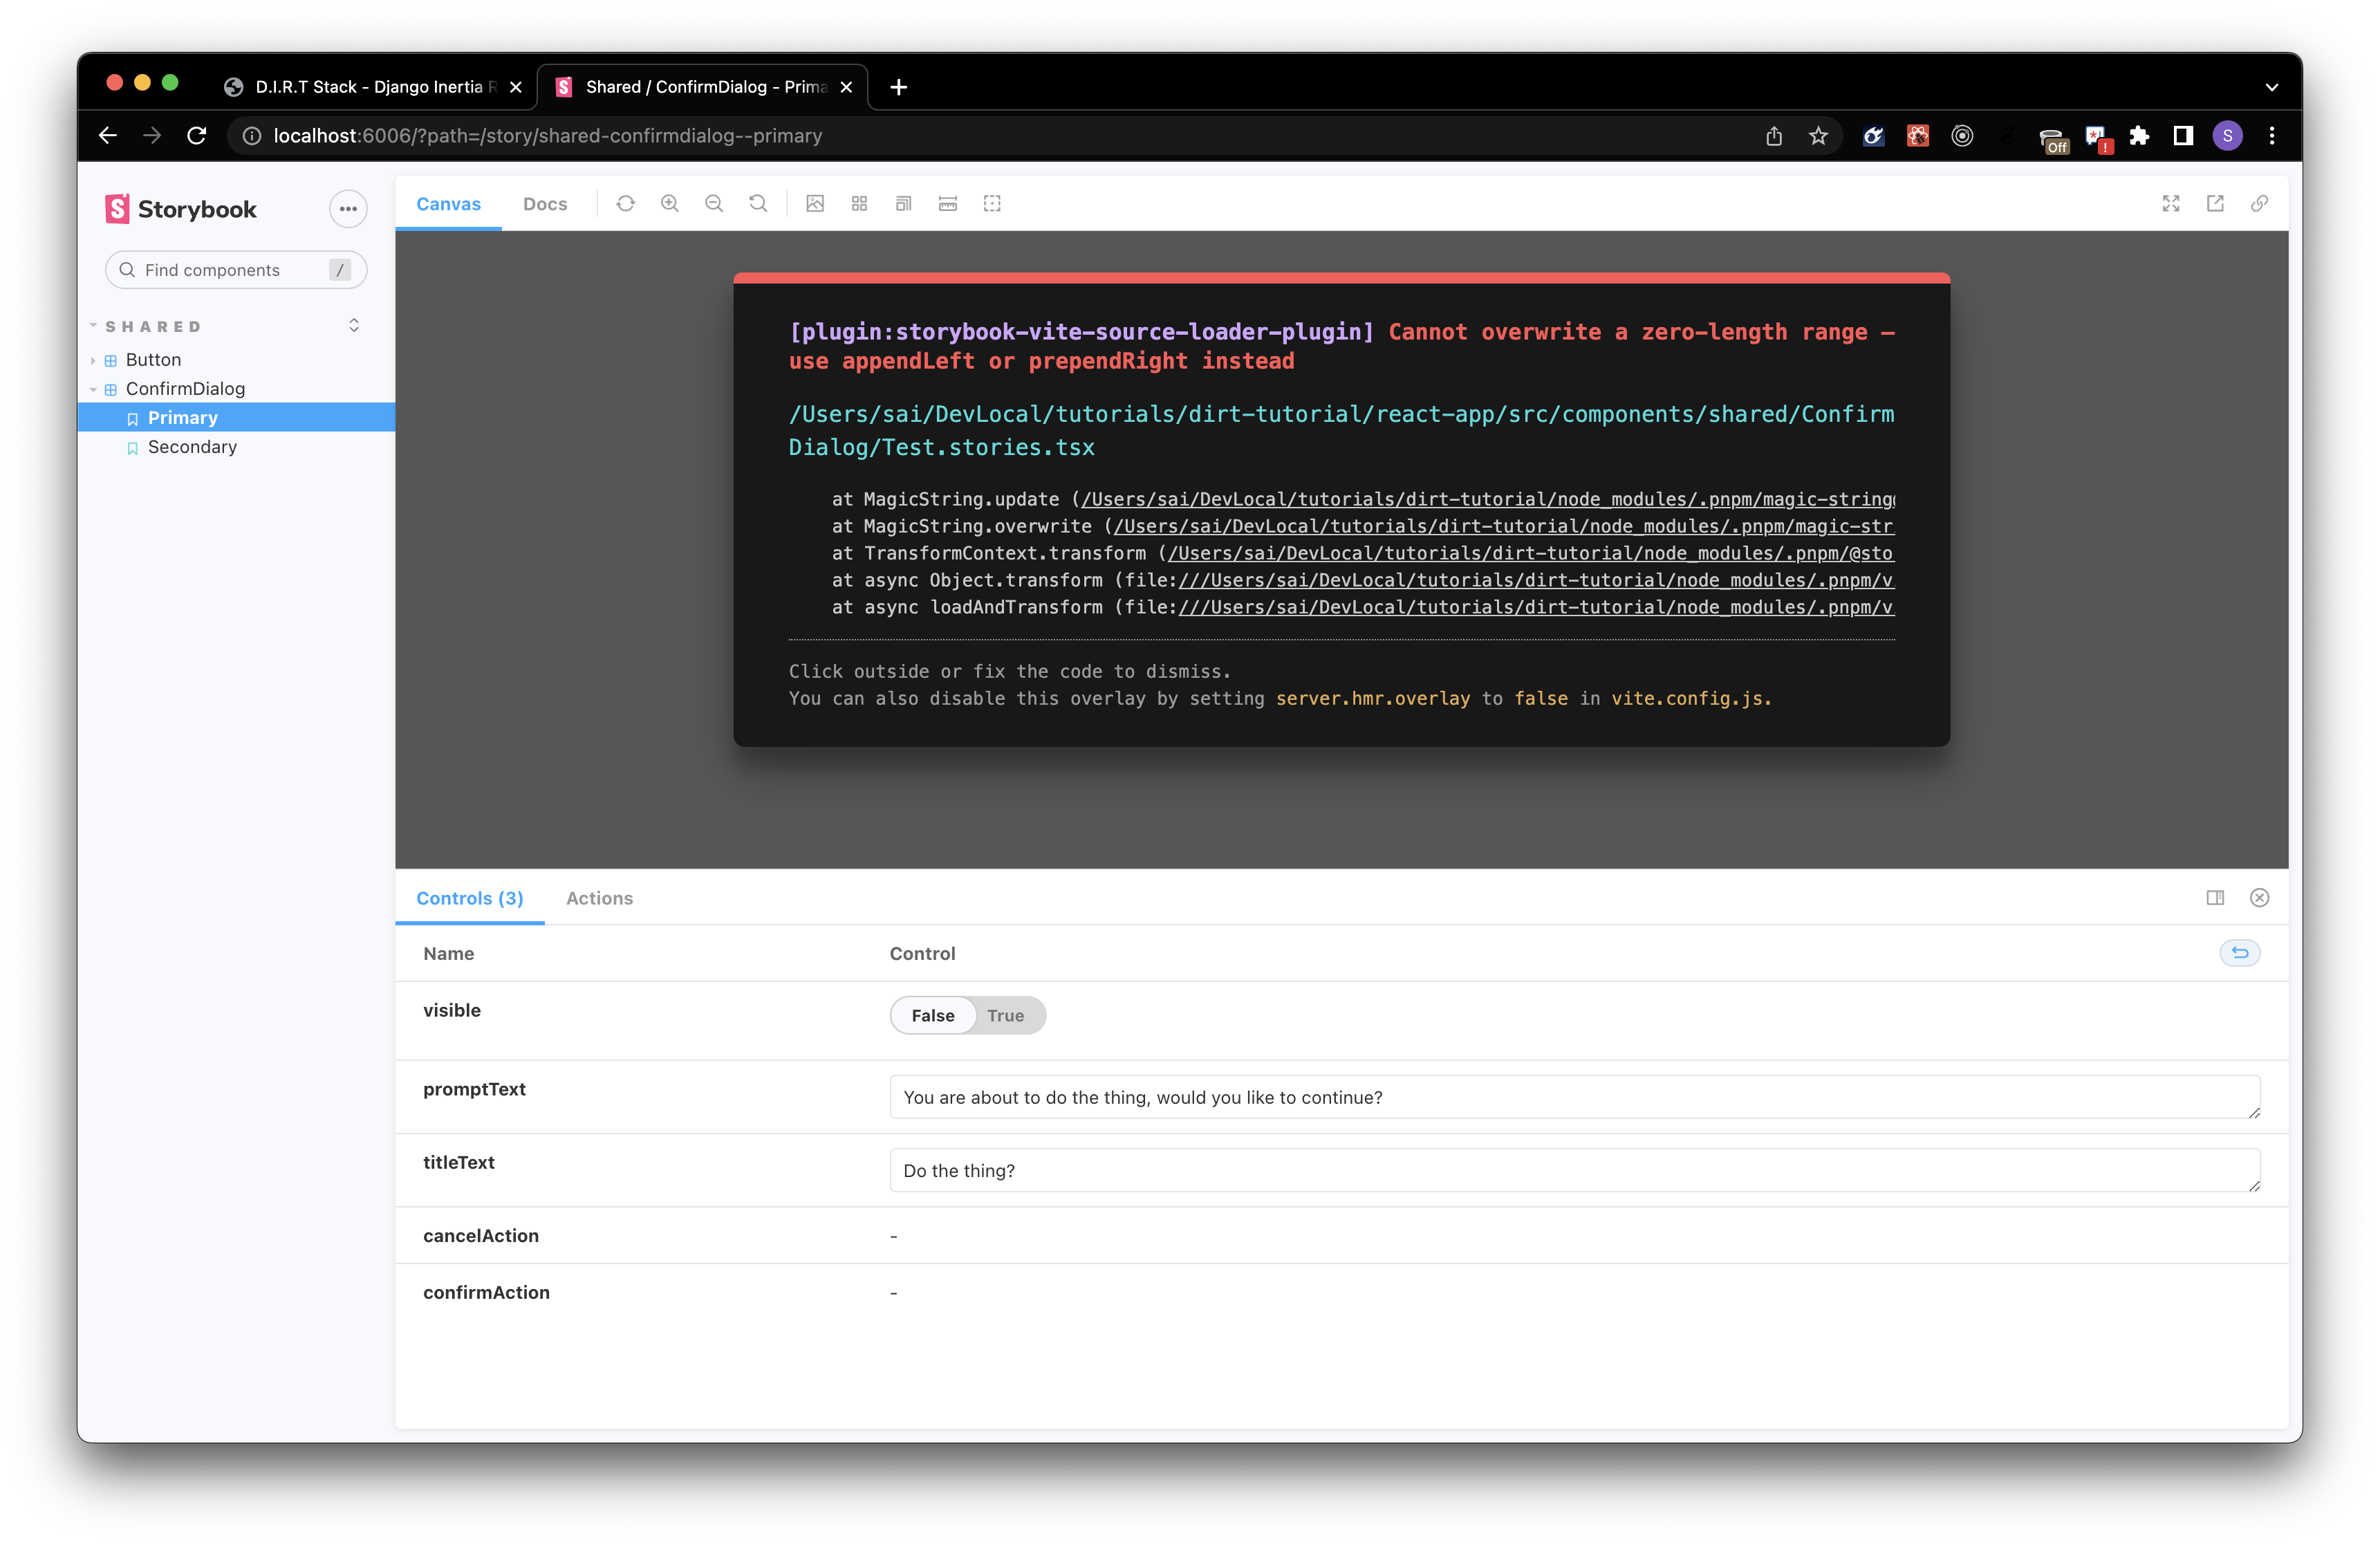
# The error as it is.
Cannot overwrite a zero-length range – use appendLeft or prependRight instead
9:49:26 PM [vite] Internal server error: Cannot overwrite a zero-length range – use appendLeft or prependRight instead
References:
The following resources were helpful in the writing of this:
What's next?
I have things related to D.I.R.T that I'm working on (starter template, etc). Stay tuned for updates. Also, I'm going to be refining the approach and optimizing a few things